How To Add Custom Scripts To ModelX
A custom script is a set of instructions used to expand or modify a website’s behavior. A script’s application can range between implementation of new features to verification with third-party services (such as Google and advertising networks).
This article will show you how to add custom scripts to your ModelX website in a few simple steps.
Keep reading to get started.
Step 1
Navigate to your website and log in with your admin account. Click the member icon in the top right corner of your website to access the login area.

After clicking the icon, you will find yourself on the Login page. Enter your Username or email into the Username or email field, your password into the Password field, and press Sign in.

Note: You can find your admin login details in one of the support tickets in the Vicetemple client area. If you’re not sure where to find them, feel free to send us a message over live chat.
Step 2
Once you’re logged in, hover over the website name in the admin toolbar at the top, and click Theme Options when the menu appears.

Step 3
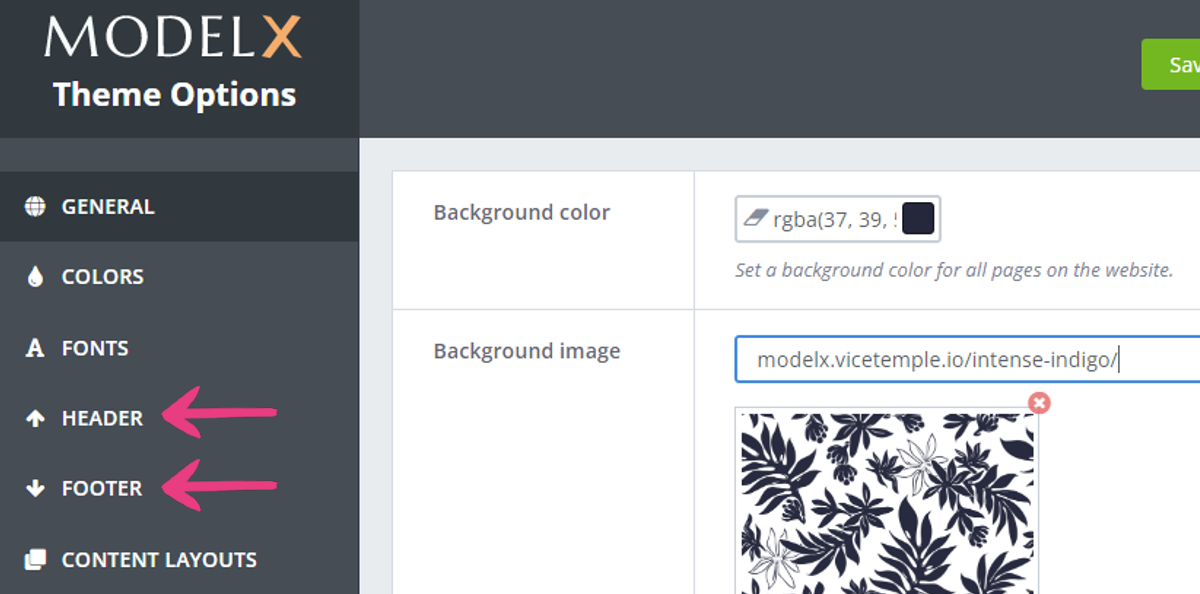
You can add custom scripts to the header and footer sections of your website.
Depending on where you want to add the script, select the Header or Footer tab, respectively.

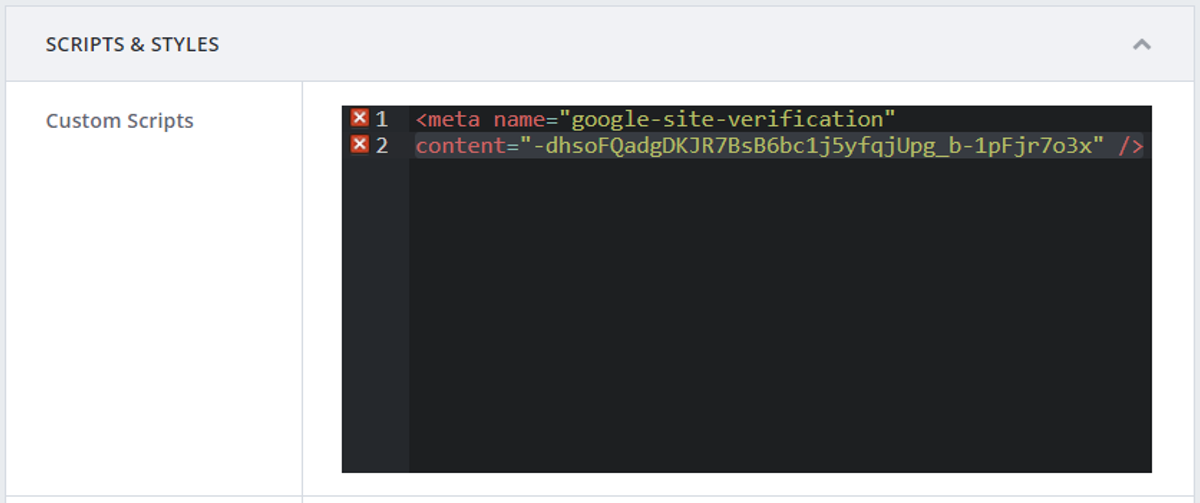
Then, scroll down to the Scripts & Styles section, locate the Custom Scripts field, and enter your script into it.

Step 4
Finally, click the Save Changes button at the top to apply the script.

Disclaimer: Custom scripts have the potential to break your website. Please proceed with caution, and if possible, always make sure to have a backup of your website files before making changes to the theme’s code.
If you need help customizing your copy of TeaseX, you can reach out to us by using one of the buttons below.


