How To Add A New Video Product
This article will guide you through the process of adding and customizing a new video product on your ModelX website.
Step 1
Navigate to your website and log in with your admin account. You can access the Login page by clicking the member icon in the top right corner of your website.

After clicking the icon, you will find yourself on the login screen. There, enter your username or email into the Username or email field, your password into the Password field, and click on Sign in.

Note: You can find your admin login details in one of the support tickets in the Vicetemple client area. If you’re not sure where to find them, feel free to send us a message over live chat.
After logging in, click on your website’s name in the admin toolbar at the top.

Scroll down the page and locate the Videos option in the sidebar on the left, hover over it, and select Add New when the menu appears.

Step 2
Once you’re on the Add new video page, enter a title for your video into the Video name input field.

Step 3
Locate the Product data section, which includes all the video product-related options, such as Payment type, Video preview, Download, and Video fields for different resolutions (explained below) – to name some of them.
Under the Payment type option, select one of the three available ways for your members to access the video:
- Free — the video will be accessible immediately, to all website visitors,
- Paid — the video will become accessible to a member after they buy it,
- Subscription — the video will be accessible only for members with active subscriptions.

Selecting Free will display a new option — Only for registered — that will let you choose whether the video product will be available to all visitors or only registered members.
Switch on the toggle to make the video product free only for your registered members.

Note: Not to be confused with subscription products that require members to pay to access your content. The product will be free and accessible the moment a member logs into the site.
Selecting Paid will display a new input field — Price — where you can specify how much you want to charge for the album (1) and checkbox — Free for membership — to make it available to your active subscribers (2).

Note: Enabling the Free for membership checkbox will effectively give your members two ways to access the product: on-demand (direct purchase for a set price) or monthly subscription.
Selecting Subscription has no additional options. Products with this payment type can be accessed only by members with active subscriptions.

Step 4
Add a preview video using one of the following methods: direct video link or direct upload.
Direct Video Link
To use this option, paste a direct link to the preview video into the Video Preview field. The preview video can be hosted on any website as long as the URL is publicly accessible and ends with one of the supported video extensions (mp4, webm, m4v, or mov).

Direct Upload
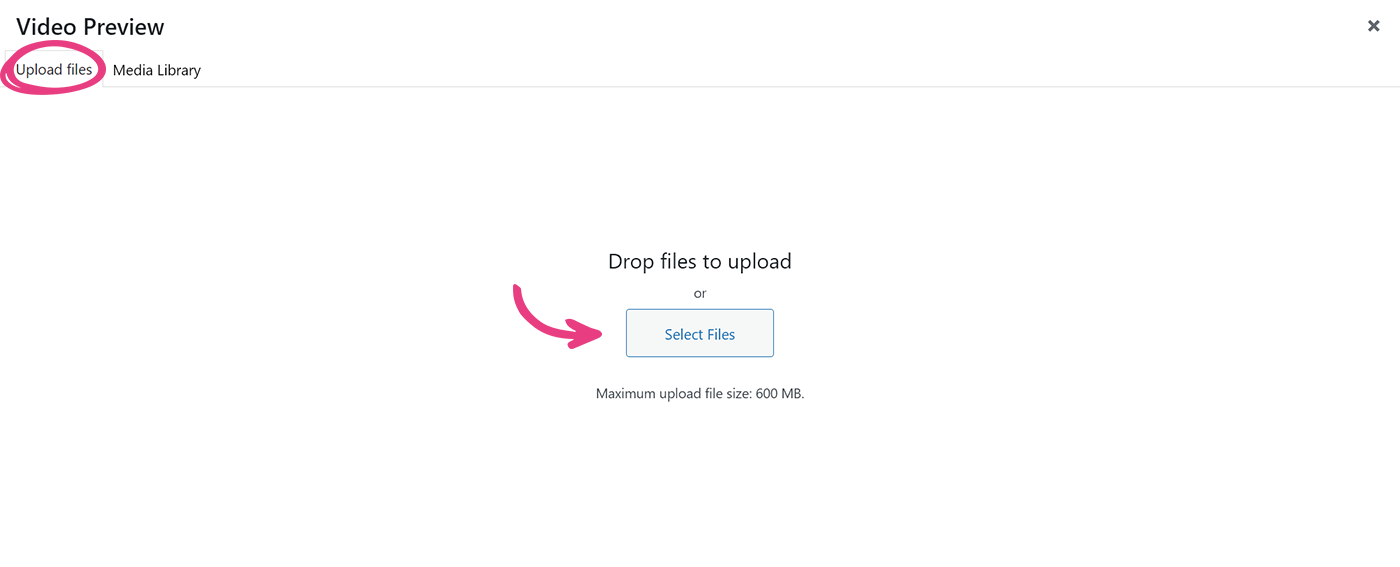
Alternatively, click the upload button at the end of the Video Preview field. Once the Video Preview popup opens, choose the Upload files tab.

Then, click the Select Files button to upload a preview video from your device.
Note: The video file should contain only alphanumeric symbols (A to Z and 0 to 9), hyphens (-), and underscores (_) to avoid potential errors.
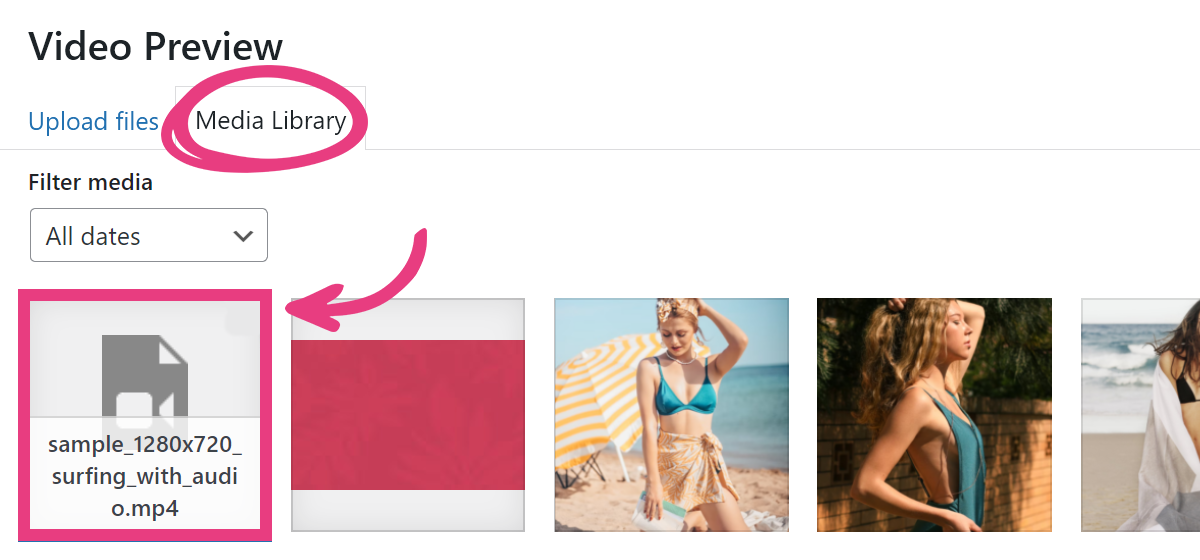
Finally, choose the video in the Media Library tab, and click Select in the bottom right corner. Please note that the video library will only display the supported formats.
Step 5
Repeat the instructions from Step 4 to add the full video to your website. If you have the video in different resolutions, you can add those versions to their appropriate field. The fields include: Video 480p, Video 720p, Video 1080p, and Video 4K.
These files will be immediately available if the payment type is set to Free. Otherwise, a member will only see the preview version until they purchase the full version or subscribe, based on your payment settings for the video.

Note: The 1080p version will be the selected by default in the video player.
Step 6
Enter a label that you want to show over the video card into the Resolution label field. If nothing is entered, the following default values will be shown: 4K, Full HD, HD, and SD for the 4K, 1080p, 720p, and 480p version, respectively. This step is optional.

Here’s a preview of what the default and custom labels will look like on the website.

Step 7
Choose whether you want your members to be able to download the full version of the video. Setting the Download option to None will hide the Download button from the video’s page and prevent your members from accessing the files directly, taking away their ability to download the video in any resolution.
Setting the option to one of the available resolutions will allow members to download only that specific file, as configured under Step 5.

Important: The download protection feature will work only on the files you upload to your website. It cannot prevent externally hosted files from being downloaded.
Step 8
After uploading the video, we recommend assigning categories to it to allow for easier filtering on the website. This step is optional.
Existing Category
To add an existing category, click the input field under Categories and select one or more desired categories from the drop-down list.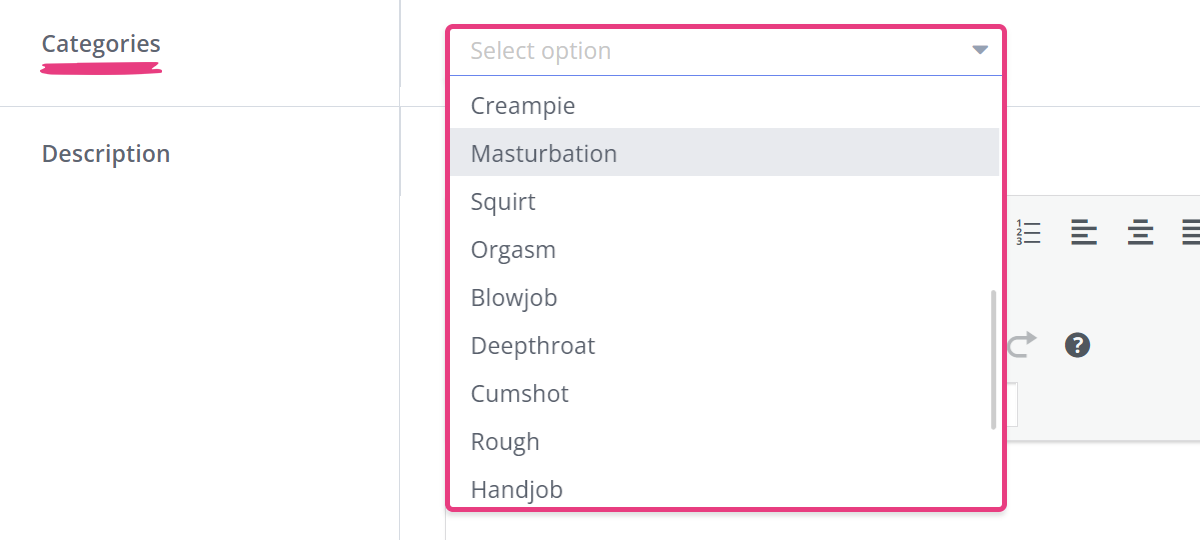
New Category
To add a new category, open the Categories page linked under Videos in a new browser tab.

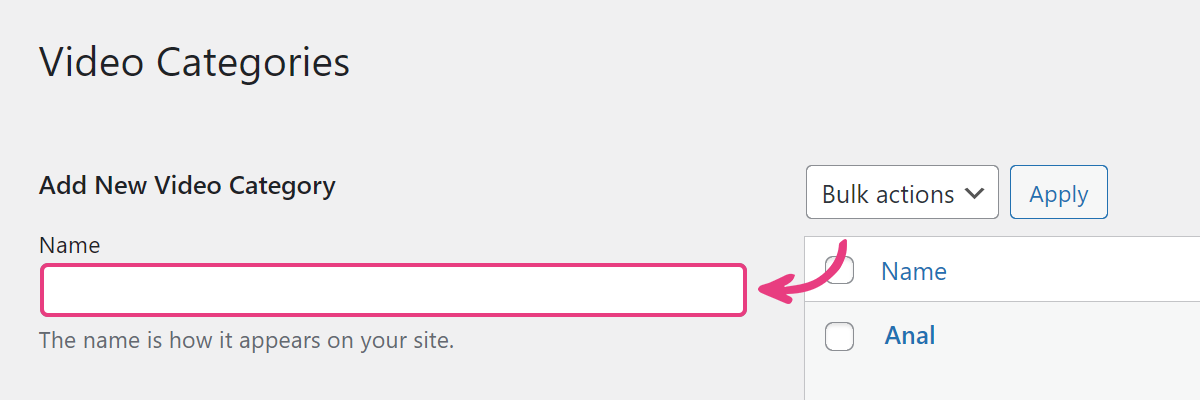
On the Video Categories page, enter the name of your new category into the Name field and click the Add New Video Category button further below.
Then, switch back to the Add new video page and click the Save Draft button in the top right section.
Saving your changes will refresh the page, and the newly-added category will become available in the Categories drop-down. Then, follow the Existing Category instructions above to apply that category to the video.
Step 9
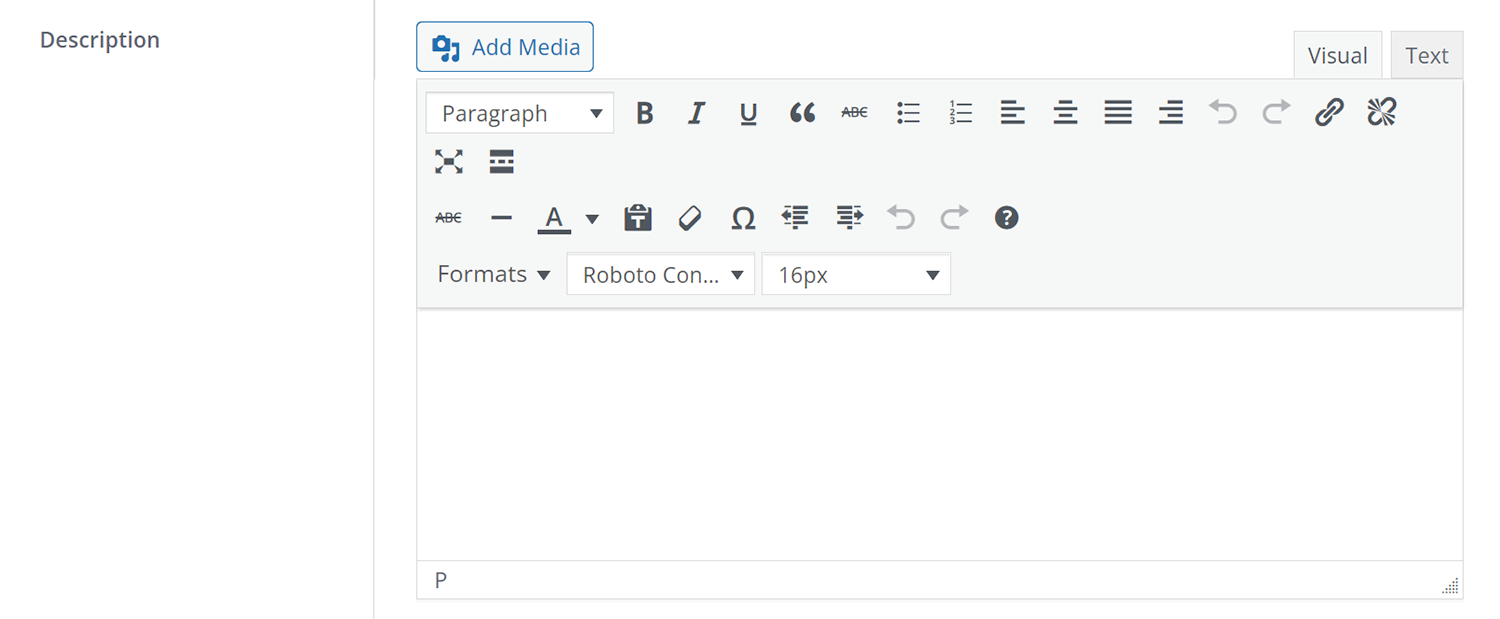
Write a description for your video in the Description field, to provide context and improve your website’s SEO. This step is optional.
The field features a text editor that supports numerous features, including, but not limited to, text formatting, media files, and links.
Step 10
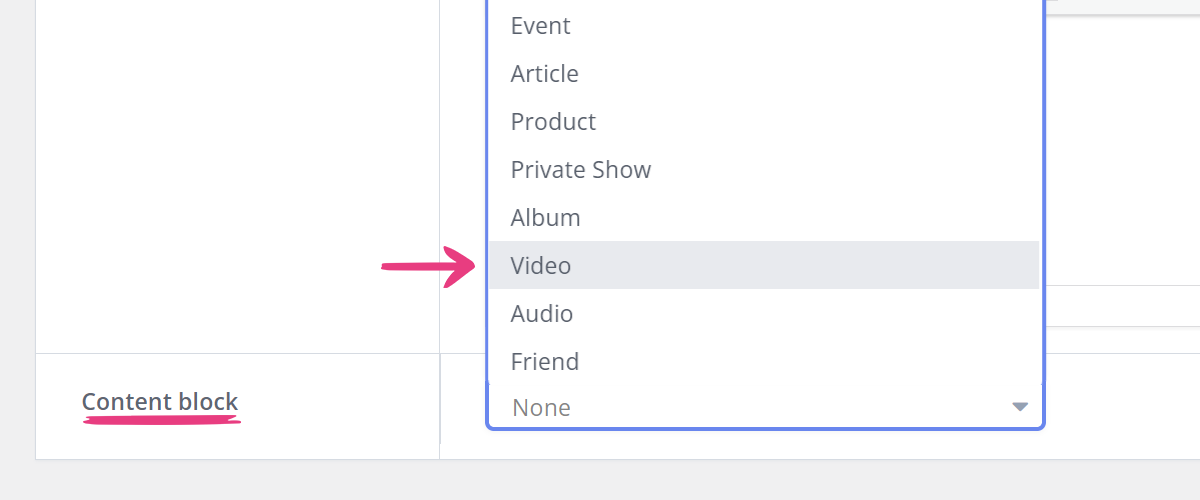
Select a page layout template from the Content block drop-down to structure your product page’s design and features. The ModelX theme comes with one premade template for video products, named Video. You are free to add and use as many templates as you like.
Step 11
Locate the Video poster section on the right and click the Set video poster link to set a cover image for the video. To upload that image, repeat the process described under Step 4: Direct Upload.

The recommended dimensions for the product image are 400 by 270 pixels.
Step 12
Click the Publish button in the top right section.
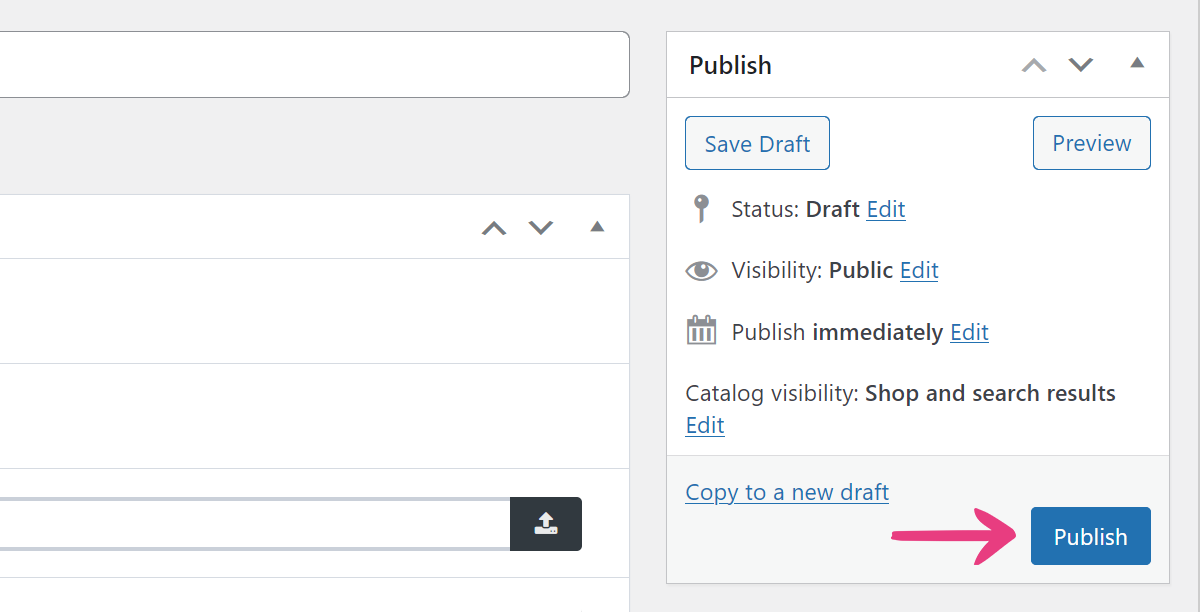
Voilà! The video is now available on your site.


