How To Change The Header Logo & Favicon
This article will guide you through the processes of changing the header logo & favicon on your ModelX website.
Start by logging in, as explained in the two steps below.
Step 1
Navigate to your website and log in with your admin account. Click the member icon in the top right corner of your website to access the login area.

After clicking the icon, you will find yourself on the Login screen. Enter your Username or email into the Username or email field, your password into the Password field, and press Sign in.

Note: You can find your admin login details in one of the support tickets in the Vicetemple client area. If you’re not sure where to find them, feel free to send us a message over live chat.
Step 2
Once you’re logged in, hover over the website name in the admin toolbar at the top, and click Theme Options in the drop-down menu.

Select the Header tab on the Theme Options page.

How To Change The Header Logo
Changing your website’s header logo includes two simple steps.
Step 1
First, locate the Logo option under Logo & Favicon and click the upload button on the right to select your logo.
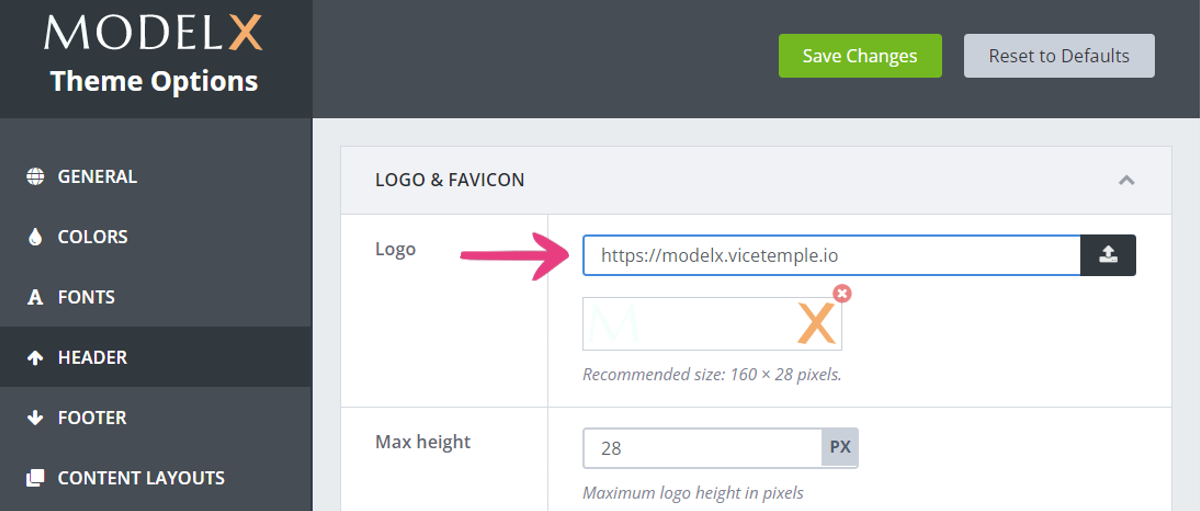
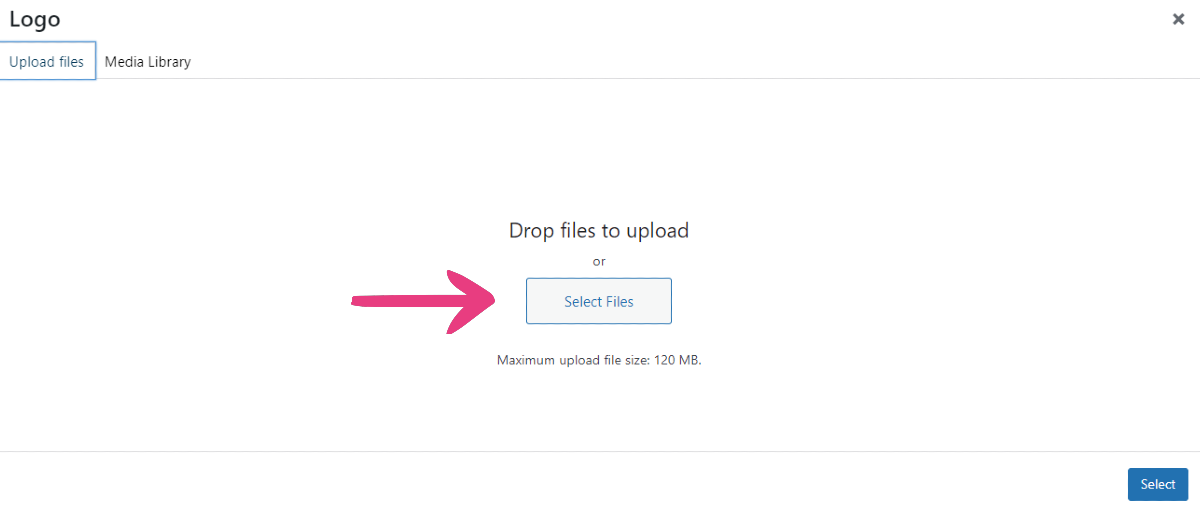
Then, click Select Files to upload an image from your device, or choose an existing image from the Media Library. Keep in mind that the recommended dimensions for the header logo are 160×28 pixels.
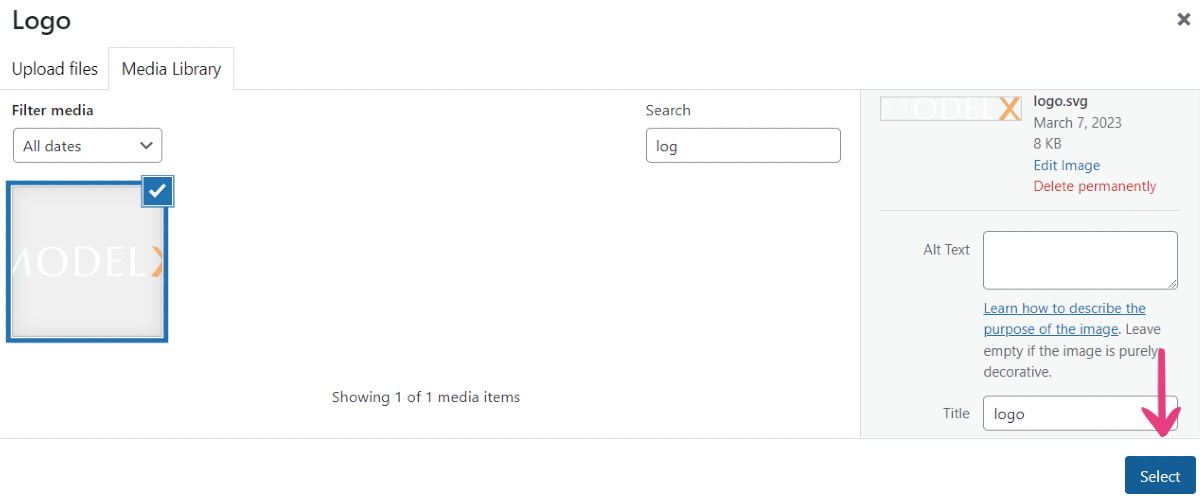
In the Media Library, your selected image will be highlighted with a blue frame and a checkmark. Click Select to confirm your choice.
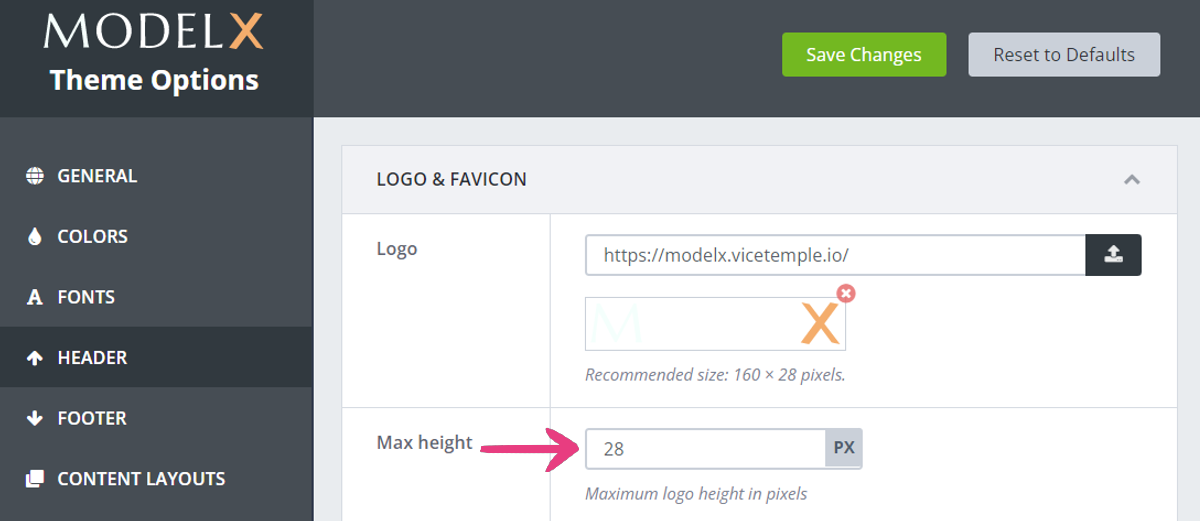
If you want, you can change the logo’s Max height on the website to adjust its size on the website.
Step 2
After picking your logo, click the Save Changes button at the top to apply your selection.
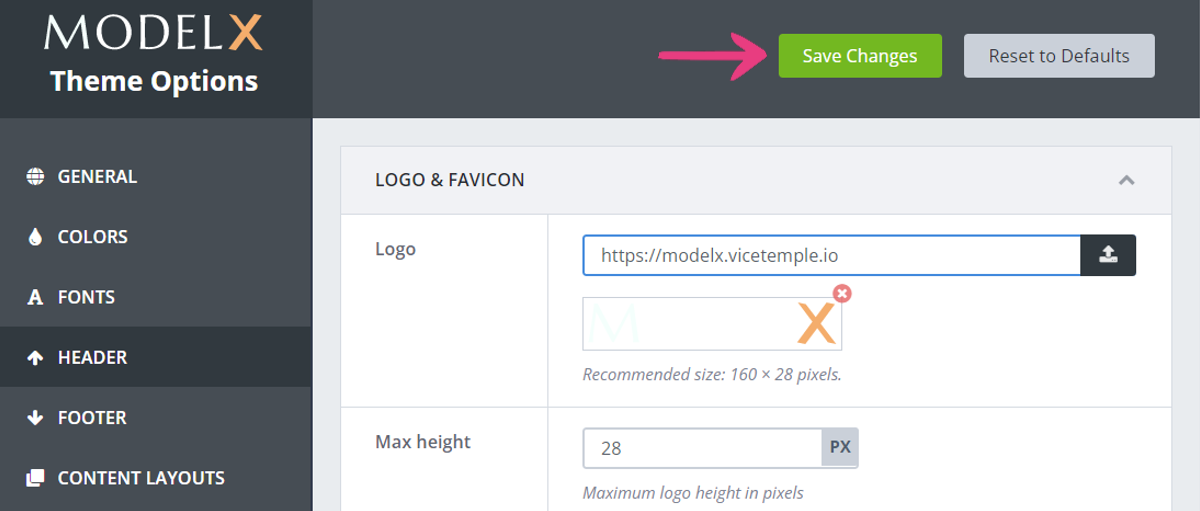
The logo will immediately be shown on your website.

Please note that this will only change the logo in your header (main menu). To change the footer logo, please check the following guide.
How To Change The Favicon
You can also change your website’s header favicon in two quick steps.
Step 1
First, find the Favicon option under Logo & Favicon and click the upload button on the right to select your favicon.
![]()
Then, click Select Files to upload an image from your device, or choose an existing image from the Media Library. Ideally, the favicon should have the recommended dimensions — 16×16 pixels.
![]()
In the Media Library, your selected image will be highlighted with a blue frame and a checkmark. Click Select to confirm your choice.
![]()
Step 2
After picking your favicon, click the Save Changes button at the top to apply your selection.
![]()
The favicon will immediately be shown on your website.
![]()


