How To Customize Footer Menus
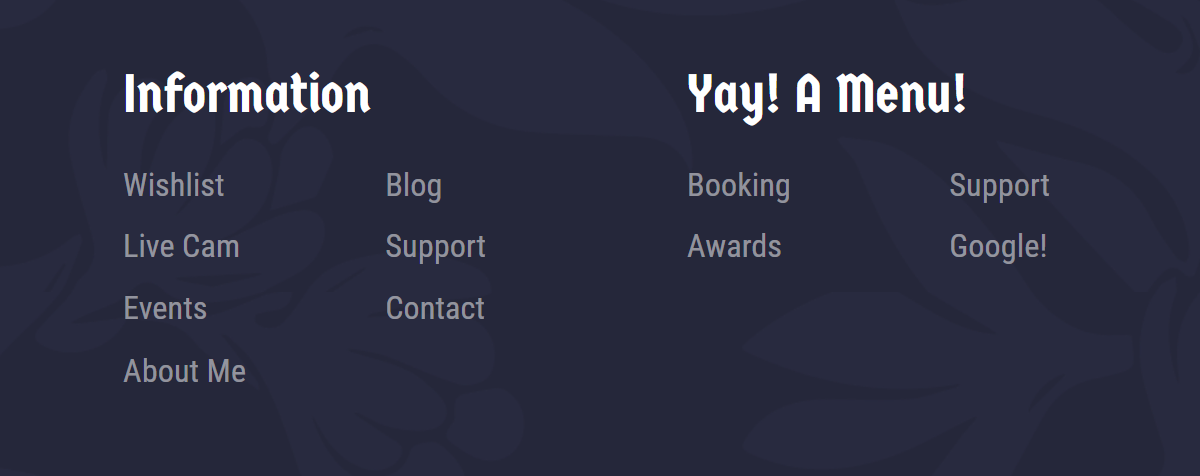
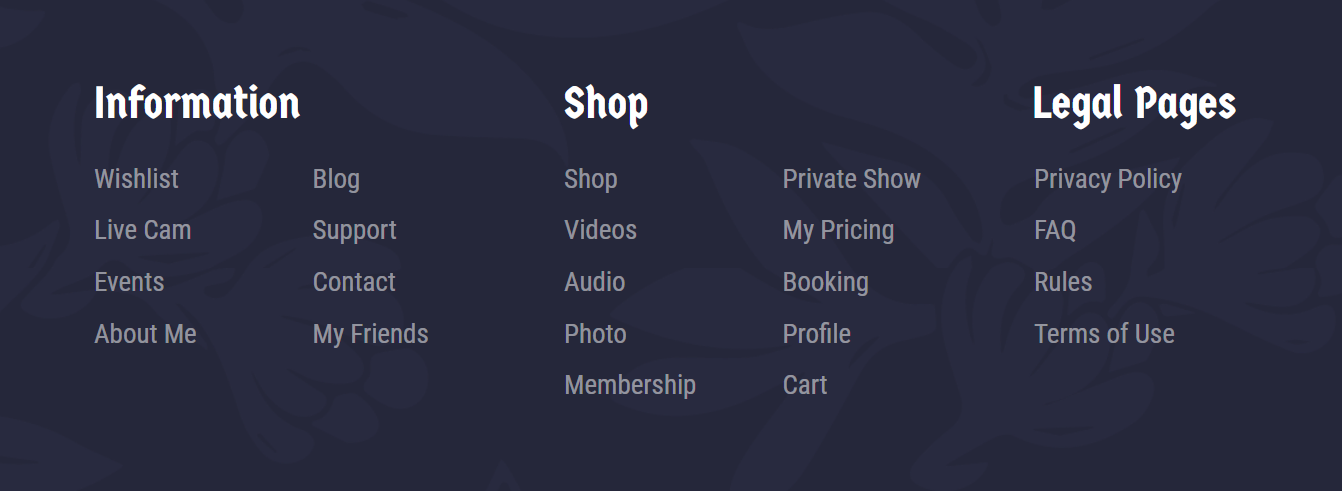
The ModelX Intense Indigo theme can display up to three footer menus at a time and includes three preconfigured ones by default. If you deleted a footer menu and wish to add it back, or if you wish to add a different one, follow the instructions below.
Step 1
Navigate to your website and log in with your admin account. The Login page can be accessed by clicking the member icon in the top right corner of your website.

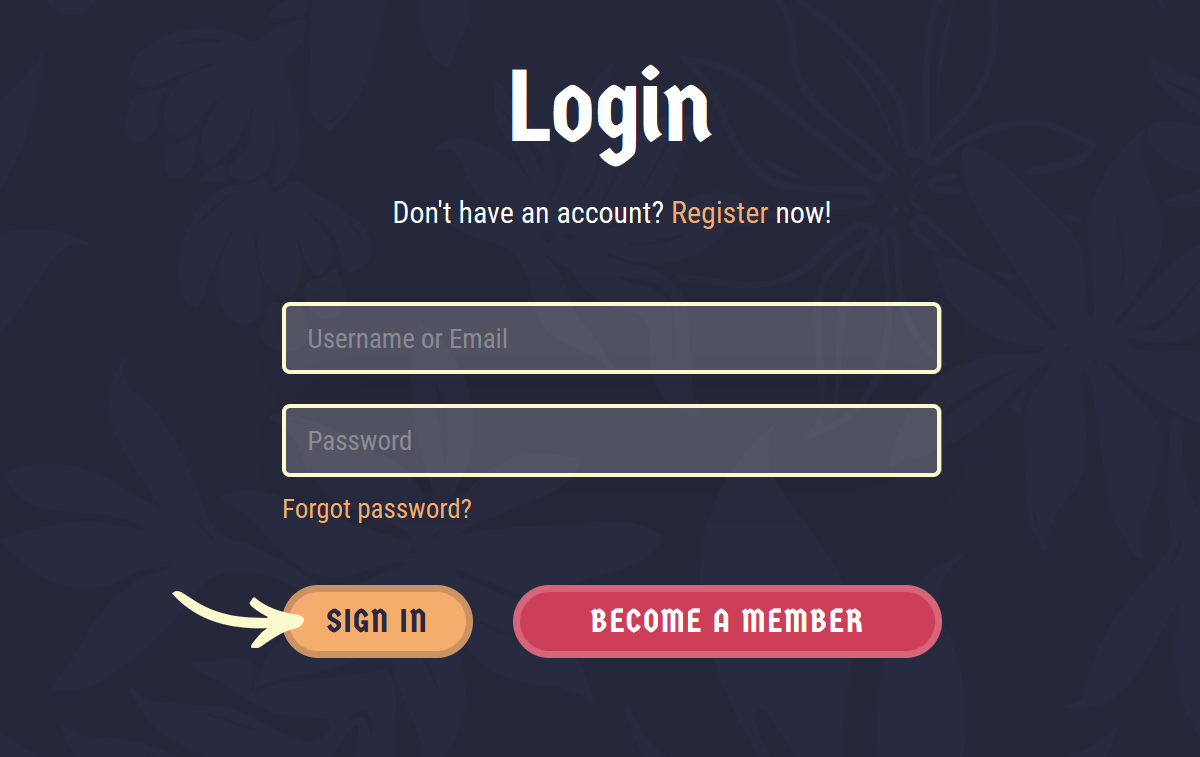
On the Login page, enter your username or email into the Username or email field and your password into the Password field, and click Sign in.
Note: You can find your admin login details in one of the support tickets in the Vicetemple client area. If you’re not sure where to find them, feel free to send us a message over live chat.
After logging in, hover over your website’s name in the admin toolbar at the top, and click WordPress Dashboard once the menu appears.

Step 2
Scroll down the page and locate the Appearance option in the sidebar on the left, hover over it, and select Customize when the menu expands.

If you already have a menu to display, skip to Step 4 to learn how to add it to the footer. Otherwise, select Menus and follow the instructions below to create a new one.
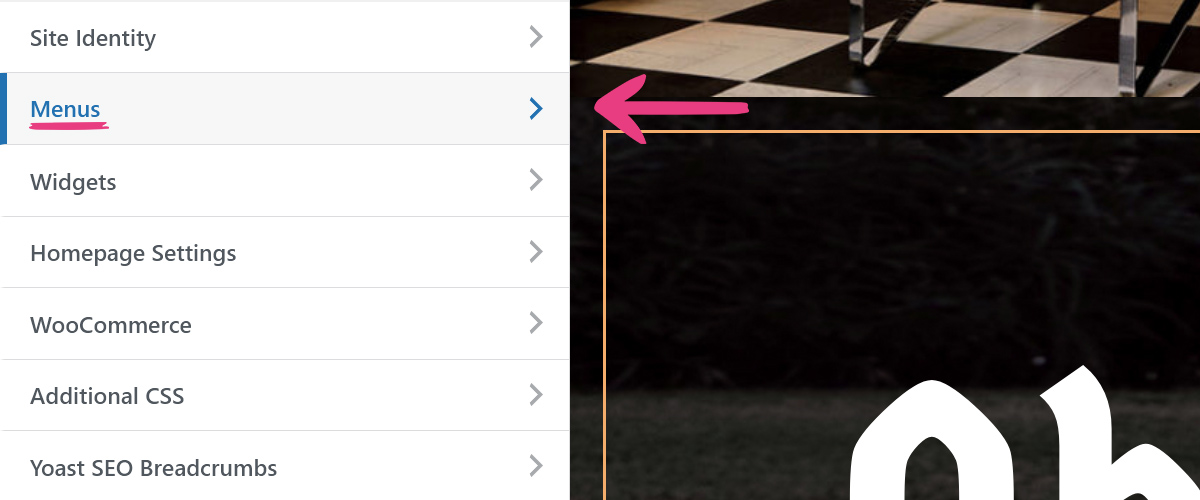
Click the Create New Menu button.

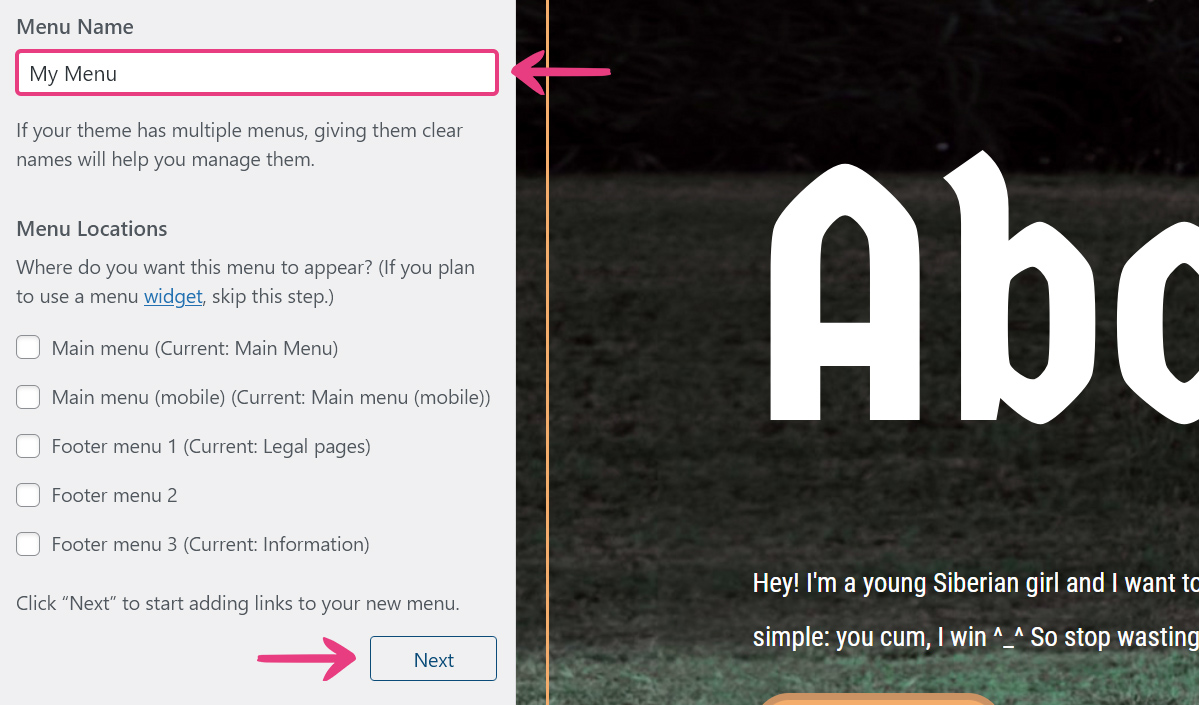
Then, give your menu a name in the Menu Name field, skip Menu Locations by leaving its options unchecked, and click Next.
Step 3
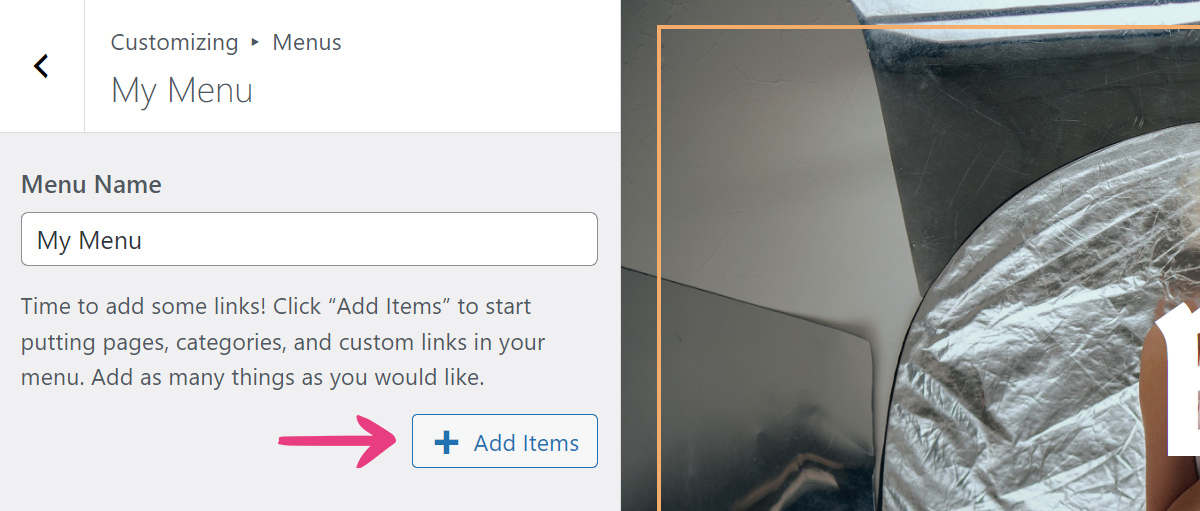
Click on Add Items to link pages, products, posts, or custom links to your footer menu.
Link Page, Product, or Post
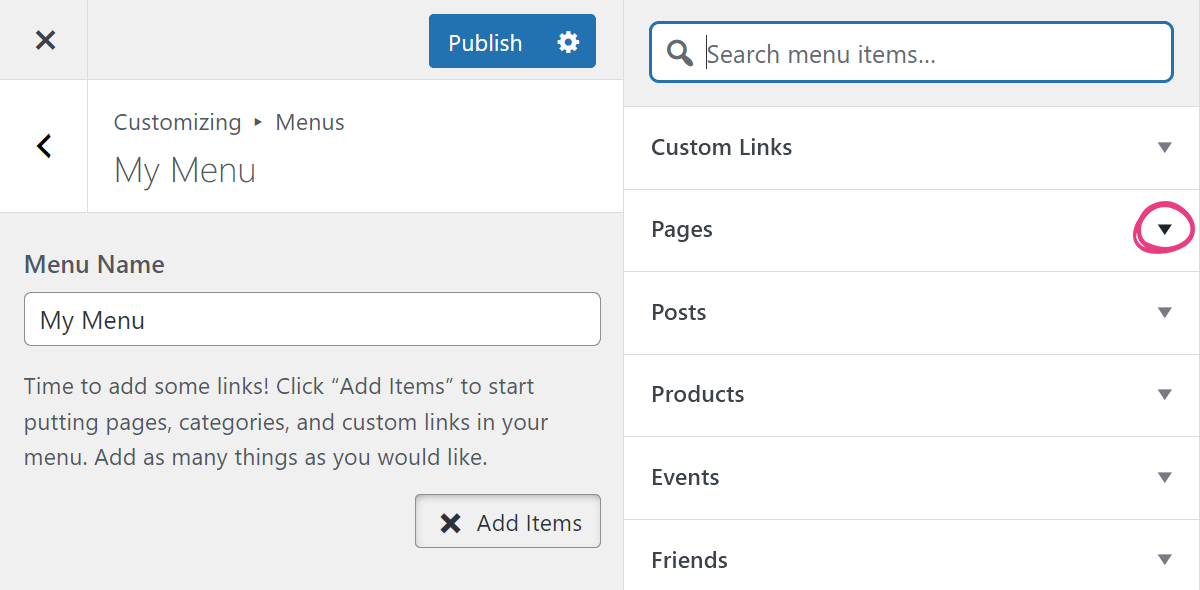
To add a page, product, or post, expand its corresponding group by clicking on the arrow in the additional sidebar.
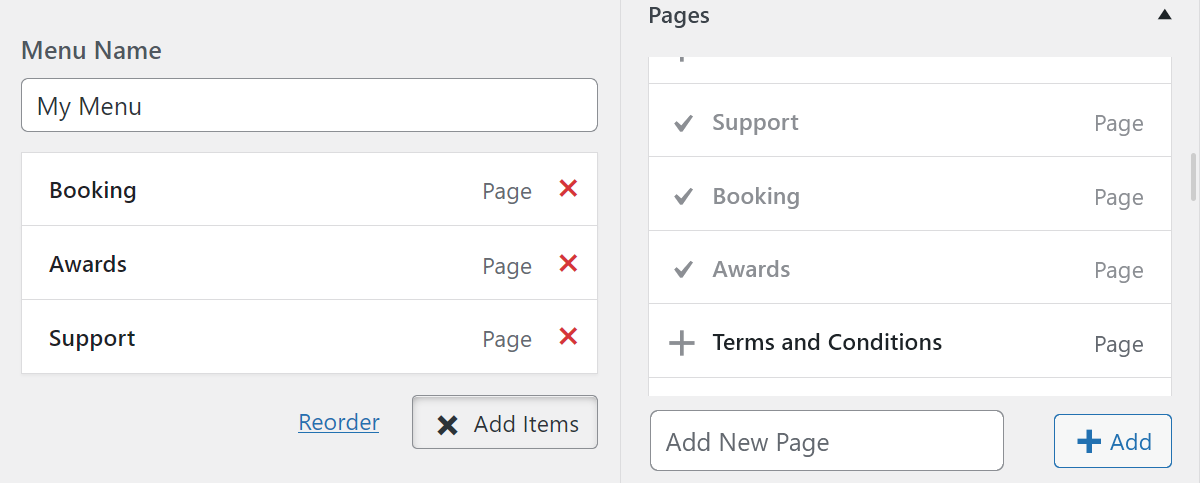
Then, click on that page, product, or post, and it will automatically be added to the menu.

Repeat the process to add the remaining items to the menu.
Add Custom Link
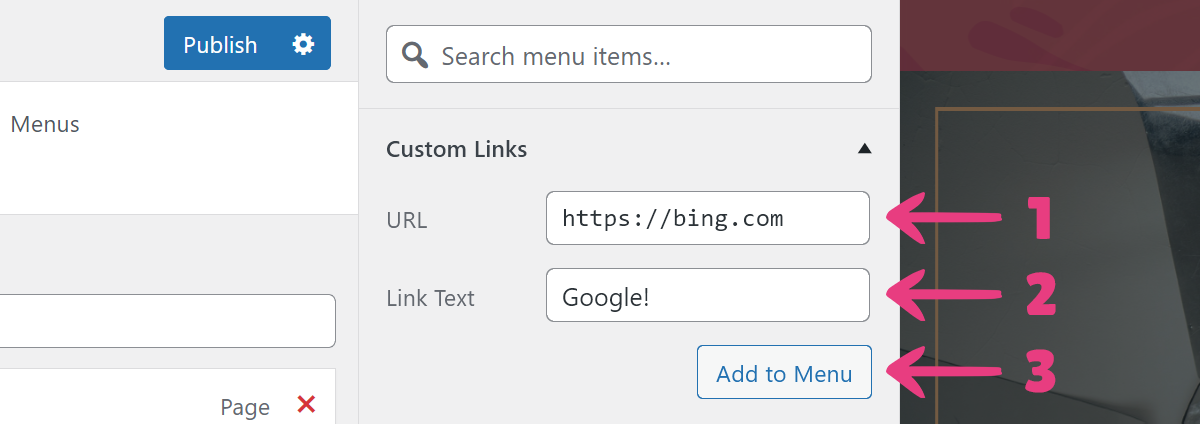
To add a custom link, locate and expand the Custom Links group at the top of the sidebar.

Then, enter the custom link and the link text that will be shown in the menu into the URL and Link Text fields, respectively. With that done, click on the Add to Menu button.
Once you’re finished creating the menu, click on the chevron icon in the top left corner to return to the menus, then navigate back to the customizer from there.

Step 4
Select Widgets to add your menu to the footer.

Select the footer column that will display the menu:
- Footer 1 — first column,
- Footer 2 — second column,
- Footer 3 — third column.

Keep in mind that only the right half of the footer can be used for menus, as depicted below.

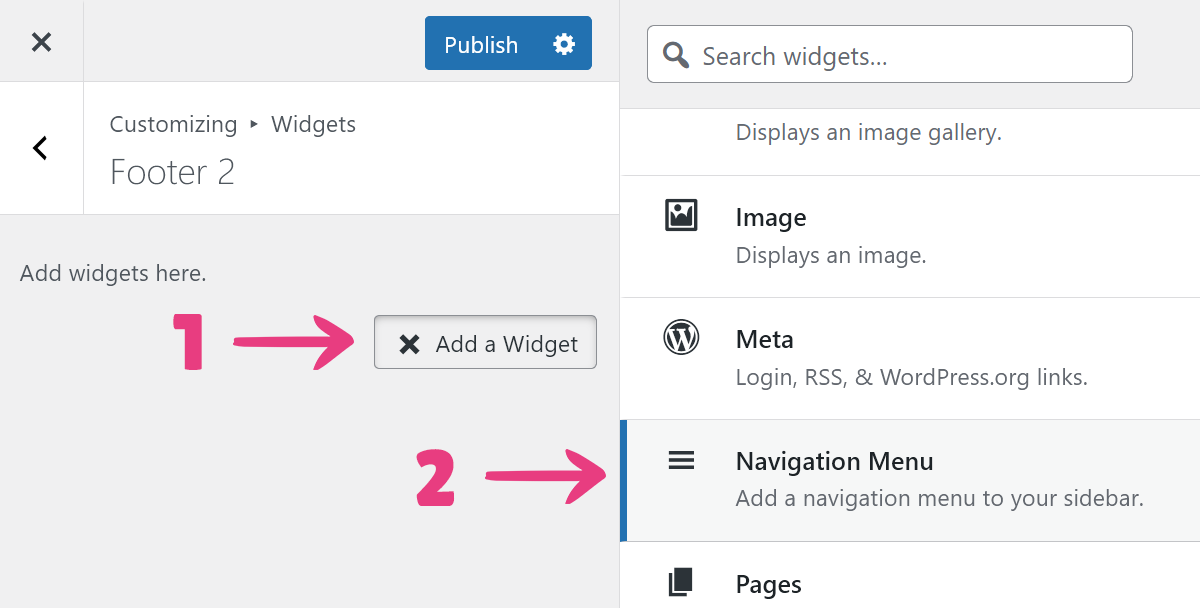
Next, click the Add a Widget button and select the Navigation Menu option to add your menu.
In the Navigation Menu block, enter a menu title that will be shown to your visitors into the Title field, and pick your menu from the Select Menu drop-down.
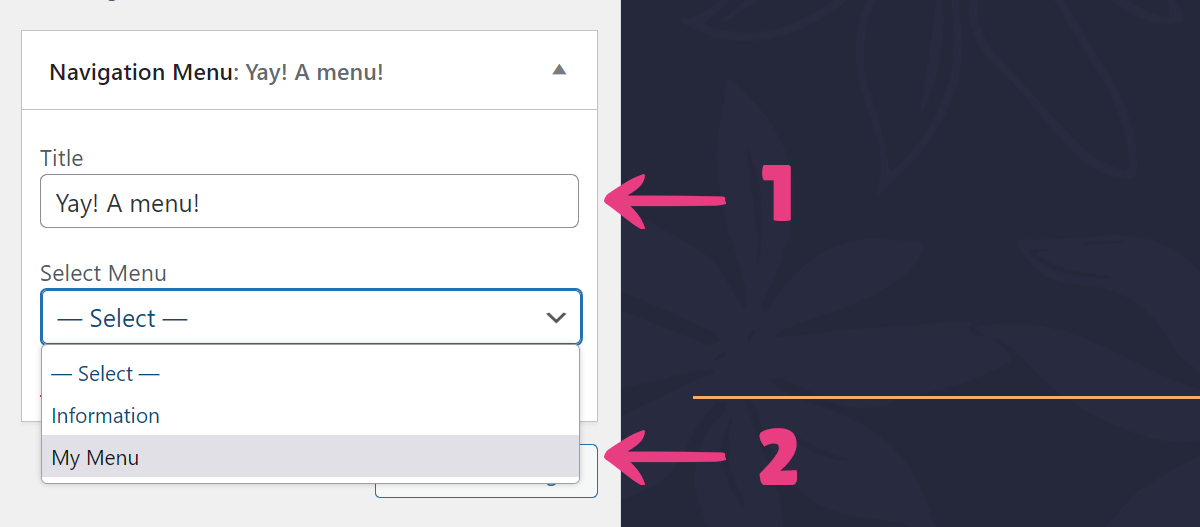
If you do not wish to display a title, leave the Title field empty.
Finally, wait for the loader to finish and click Publish at the top to apply your changes.

The new menu will appear in the footer.
