How To Install The ModelX Theme
This article will help you install and activate the ModelX theme on your website. To avoid any difficulties with the setup process, please read up on the theme’s requirements before starting.
Acquire the Theme Installer
Once your payment is processed and your order status changes from Pending to Active, the theme’s installation files and your license key will become available in the Vicetemple client area. Follow the steps below to get the theme installer.
Step 1
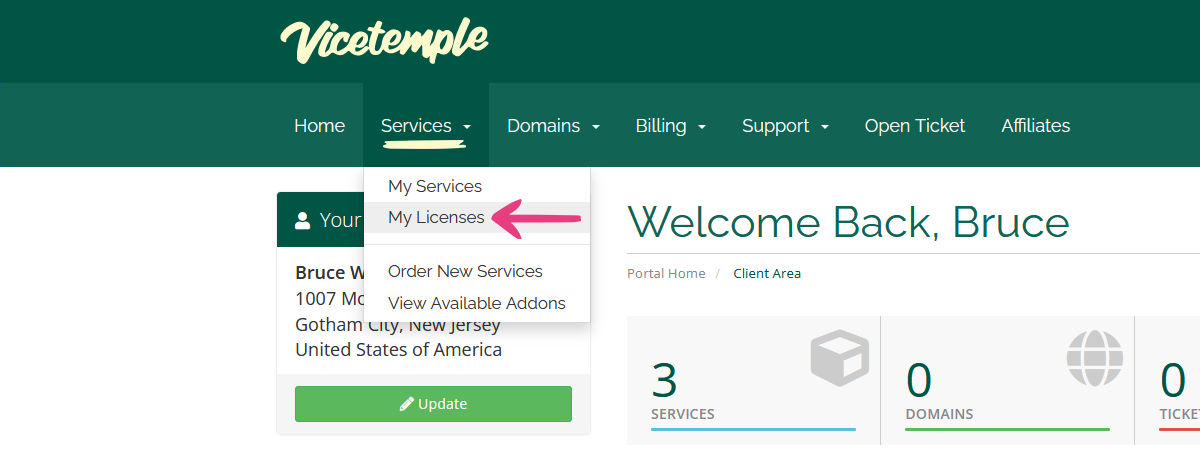
Log into our client area, click on Services, and select My Licenses from the drop-down menu.

Step 2
Locate your ModelX product — for example, ModelX (Intense Indigo) — and click on it.

To save the zip file containing the theme’s installer, click on the Download Now button at the top.

Important: For successful installation, the installer must remain a ZIP file. Please do not extract it.
Upload the Installer to Your Website
The theme runs on the WordPress content management system, which you need to have installed on your website to install the theme in the first place. For instructions on how to install WordPress, please see the official guide by WordPress.org, or contact your hosting provider.
The theme installation process will be covered in the steps below.
Disclaimer: To avoid any issues when installing and using the ModelX theme, we recommend installing it on a clean copy of WordPress. Be aware that installing the ModelX theme on an existing website will result in the removal of all data from the database, potentially leading to complete data loss. We advise backing up your current data before proceeding with the installation to minimize any risks. Alternatively, consider installing the theme on a staging site for testing and preparation.
Step 1
Log into your website using your WordPress admin credentials, hover over your website’s name in the top left corner, and select Dashboard.

Once the admin panel loads, locate and hover over the Plugins option and select Add New when the menu appears.

Step 2
Click the Upload Plugin button at the top of the page.

After that, click on Browse, locate and select the downloaded ModelX Theme Installer.zip file, and click the Install Now button.

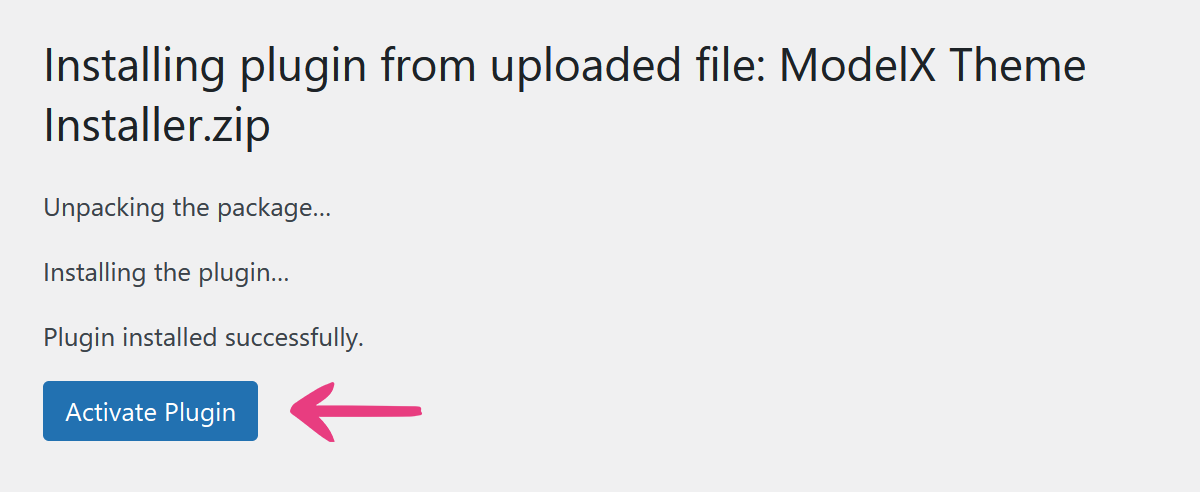
Once the plugin is installed, click the Activate Plugin button, which will activate it and direct you to the ModelX Theme Installer page.

Step 3
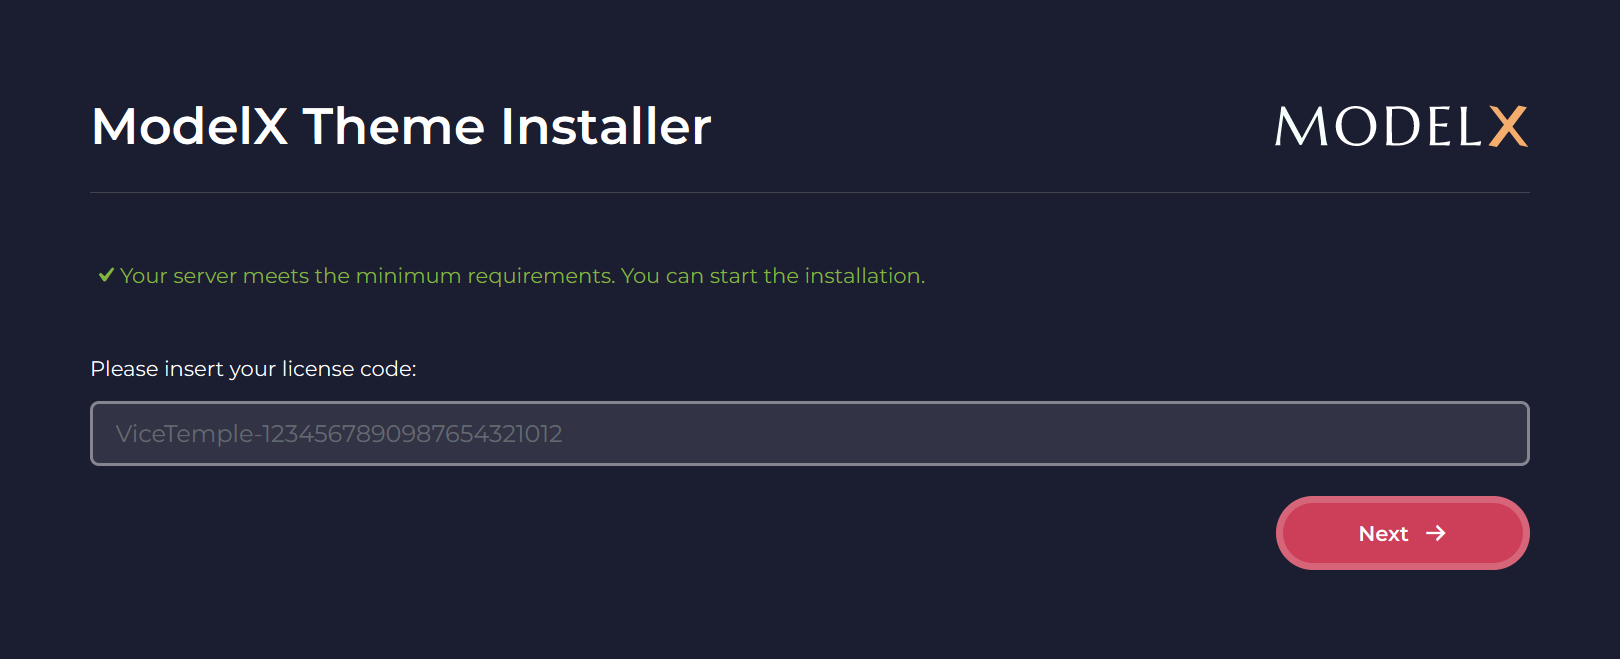
If your web server meets the minimum requirements, the ModelX Theme Installer page will show a message stating that you may install your theme, along with an input field for your license key.

Install the ModelX Theme
Now that the plugin is ready, you will need to enter your license key to download and install the ModelX theme. Follow the steps below to acquire your license key and activate the theme.
Step 1
Navigate back to the product page from which you downloaded the installer and copy the entire license key from the License Key field — including the Vicetemple part.

Step 2
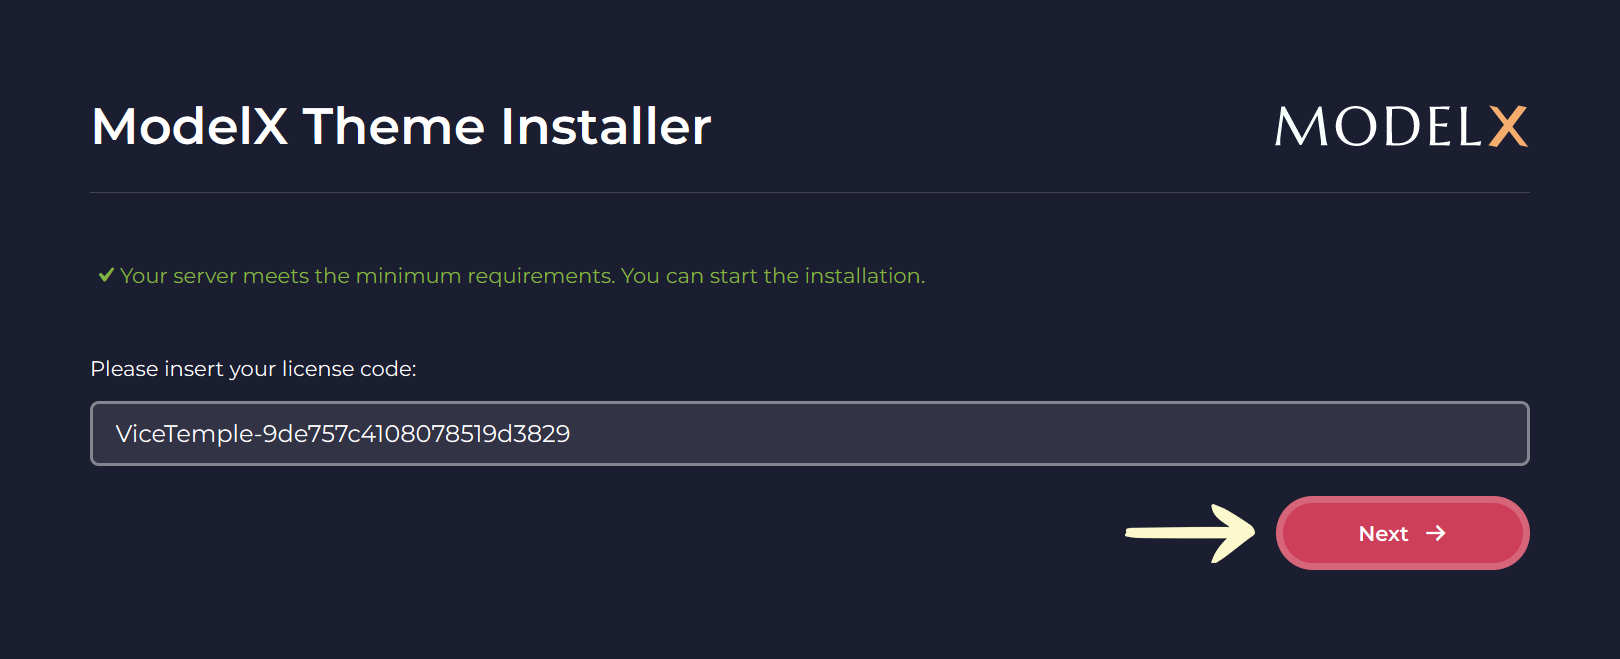
Go back to the ModelX Theme Installer page on your website, paste the license key into the input field, and click Next. Then, wait until your theme is activated.

Once the theme’s splash screen is shown, click Import Theme to to import the files to your website.

Wait for the installer to finish the process.

Step 3
After the installer imports the files, click the Install Theme button and wait for ModelX to install.

Note: The installer will set up an exact copy of the ModelX demo and its content.
Once the installation process concludes, you will be logged out of your website.
Log back in using your admin account to start using the ModelX theme’s features and customize your website.


