How To Manage Subscription Plans
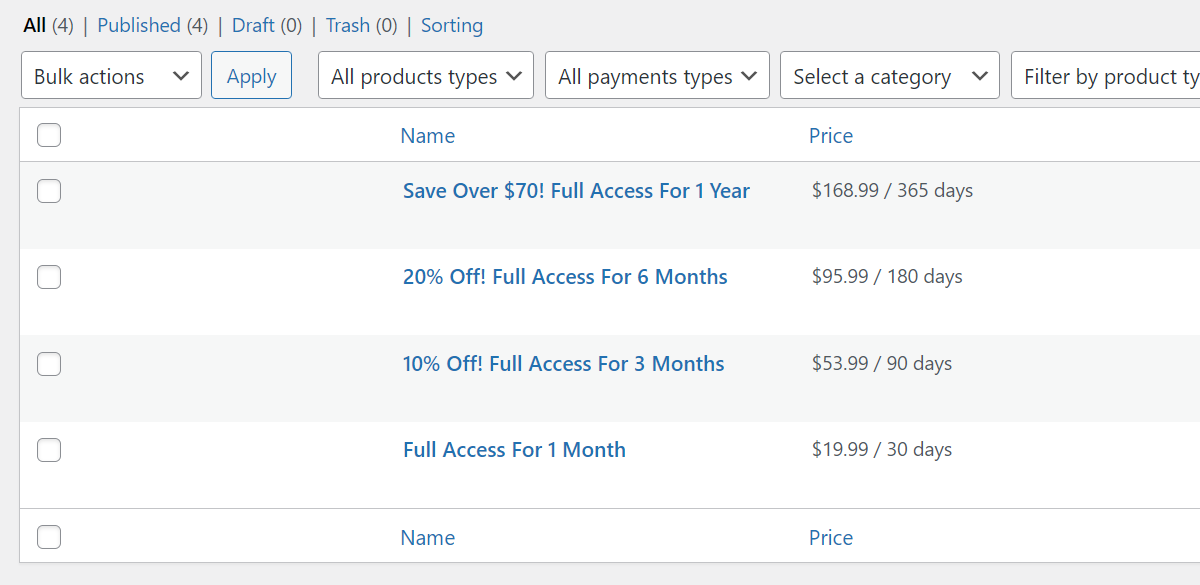
The ModelX theme comes with four preconfigured subscription plans that give the user full access for one, three, six, or twelve months, and bill them for $19.99, $53.99, $95.99, and $168.99, respectively.
However, you can modify each plan’s price, text and duration, delete existing plans, or add any number of new plans to your ModelX website. Follow the guide below to learn how to do it.

Log In
Navigate to your website and log in with your admin account. The Login page can be accessed by clicking the member icon in the top right corner of your website.

On the Login page, enter your username or email into the Username or email field and your password into the Password field, and press Sign in.

Note: You can find your admin login details in one of the support tickets in the Vicetemple client area. If you’re not sure where to find them, feel free to send us a message over live chat.
After logging in, click on your website’s name in the admin toolbar at the top.

Locate Plans
Scroll down the page and locate the Products option in the sidebar on the left, hover over it, and select Membership Plans when the menu appears.

Once the page loads, you will see a list of all currently available plans on your website, as well as each plan’s pricing and duration. From here, you can manage your plans by following the instructions below.
Modify Plans
To modify an existing plan, hover over it, and click Edit when the option appears.

In the first field, you can change the plan’s title.

The title entered here will be displayed in bolded text just above its description on the page, as depicted below.

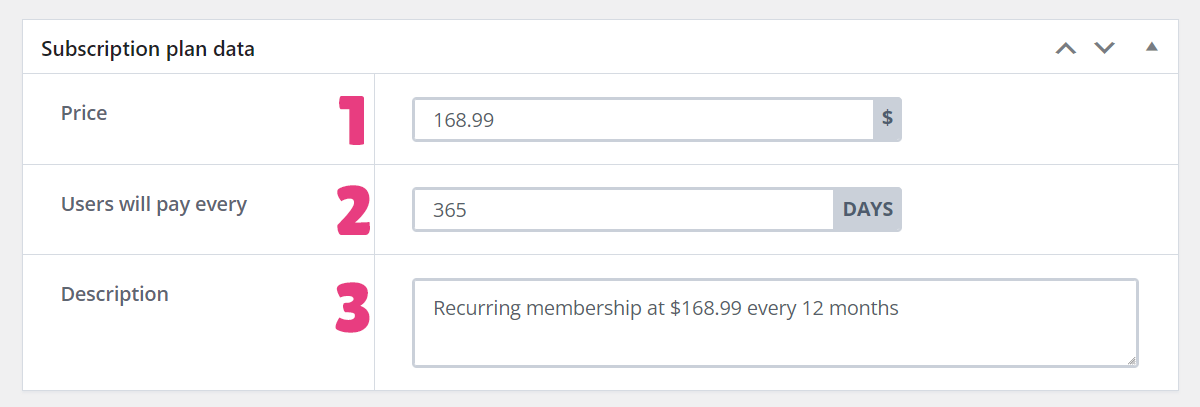
Next, in the Subscription plan data section, you can change the following:
- Price — the price of your plan, billed every X days,
- Users will pay every — billing frequency for the price,
- Description — your plan’s description.
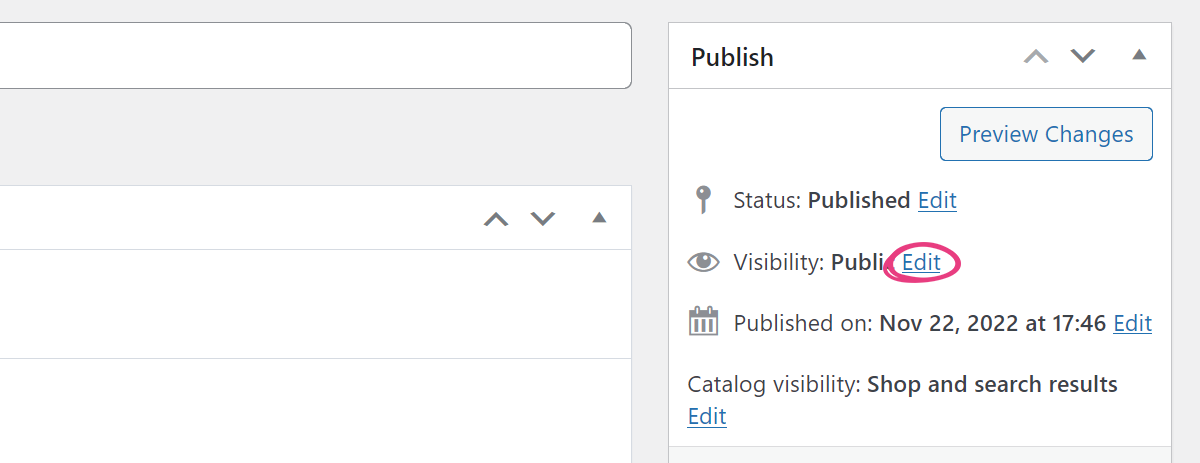
Finally, you can change a plan’s visibility and hide it from your members.
To do so, locate the Publish section on the right and click Edit next to the Visibility option.
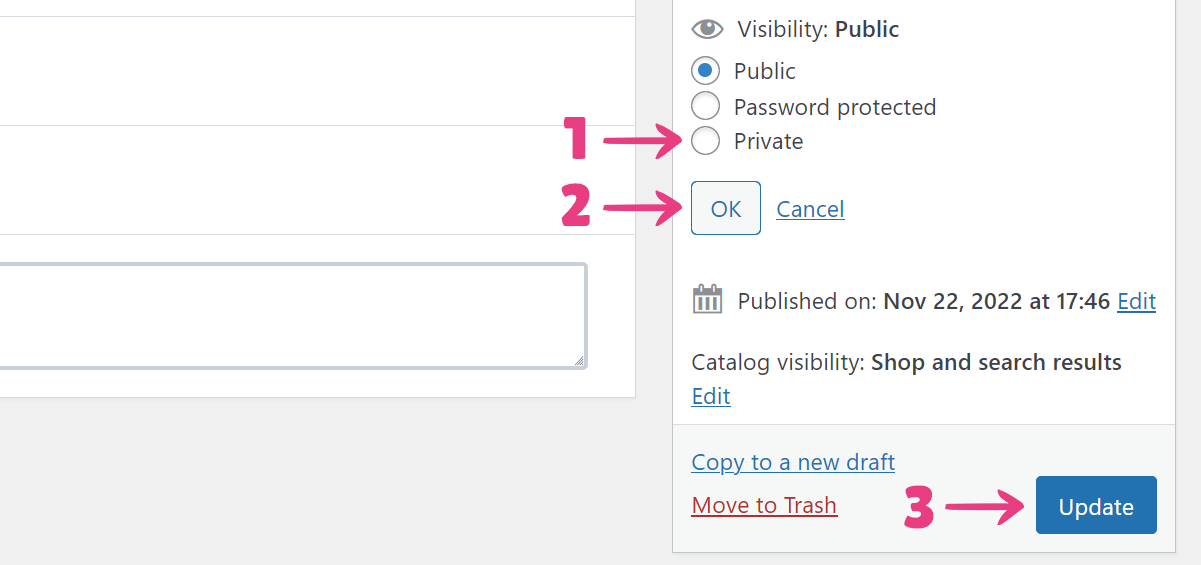
Then, set the plan’s visibility to Private, click Ok, and click the Update button.
Add Plans
To add a new plan, click the Add membership plan button on the Membership Plans page, and follow the Modify Plans instructions above to fill in the necessary information about your plan.

Delete Plans
To remove a plan from your website, hover over it on the Membership Plans page and click Trash when the option appears.

Important: Once a plan is deleted, all members that were subscribed to it will have to subscribe to a different plan when their current period ends. Their existing subscriptions will stay effective until then.


