How To Manually Add Subscription Plans To Members’ Accounts
Members can obtain subscriptions on your ModelX website in two ways: by purchasing a subscription plan using the checkout process or by you adding a subscription plan to their account.
This article will cover the latter — manually adding subscription plans to user (member) accounts. Read on to learn more.
Step 1
Navigate to your website and log in with your admin account. Click the member icon in the top right corner of your website to access the login area.

After clicking the icon, you will find yourself on the Login page. Enter your username or email into the Username or email field, your password into the Password field, and click on Sign in.

Note: You can find your admin login details in one of the support tickets in the Vicetemple client area. If you’re not sure where to find them, feel free to send us a message over live chat.
Step 2
Once you’re logged in, click on the website name in the admin toolbar at the top.

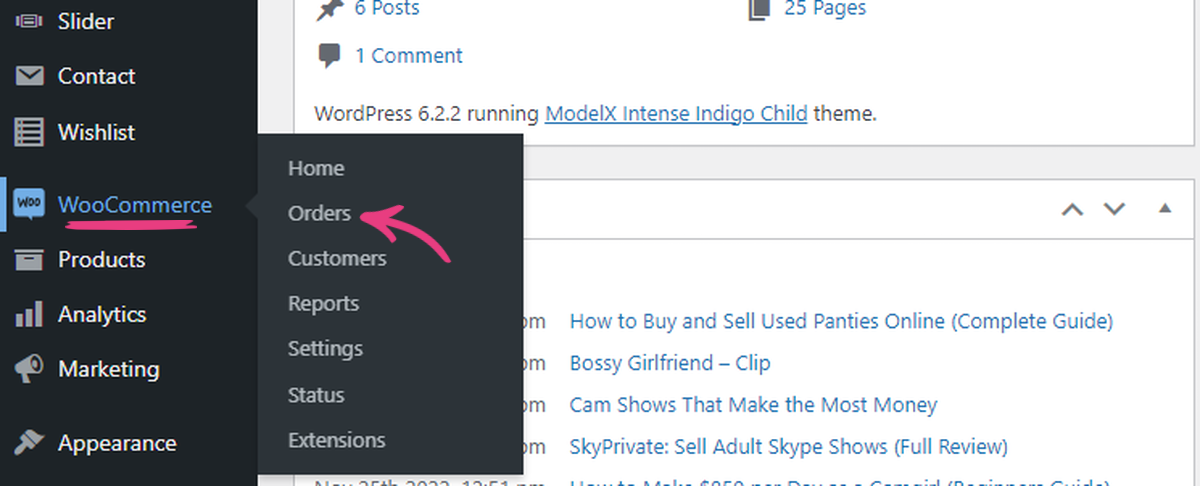
Then, hover over WooCommerce on the left and click on Orders when the option appears.

Step 3
Click the Add order button at the top to create a new order.

On the Add new order page, you will be able to add any type of product, content, or subscription to your members’ accounts, but this guide will just cover subscriptions.
You will do so by filling out the options on the page, then hitting the Add product(s) button as covered below. Let’s take a look at what the process includes.
Date created (Optional)
Because subscriptions eventually expire, you will need to indicate a starting date. To do so, change the Date created field to the date the member’s subscription will begin.

You can skip this field if you want the subscription to commence from the moment you create it.
Status
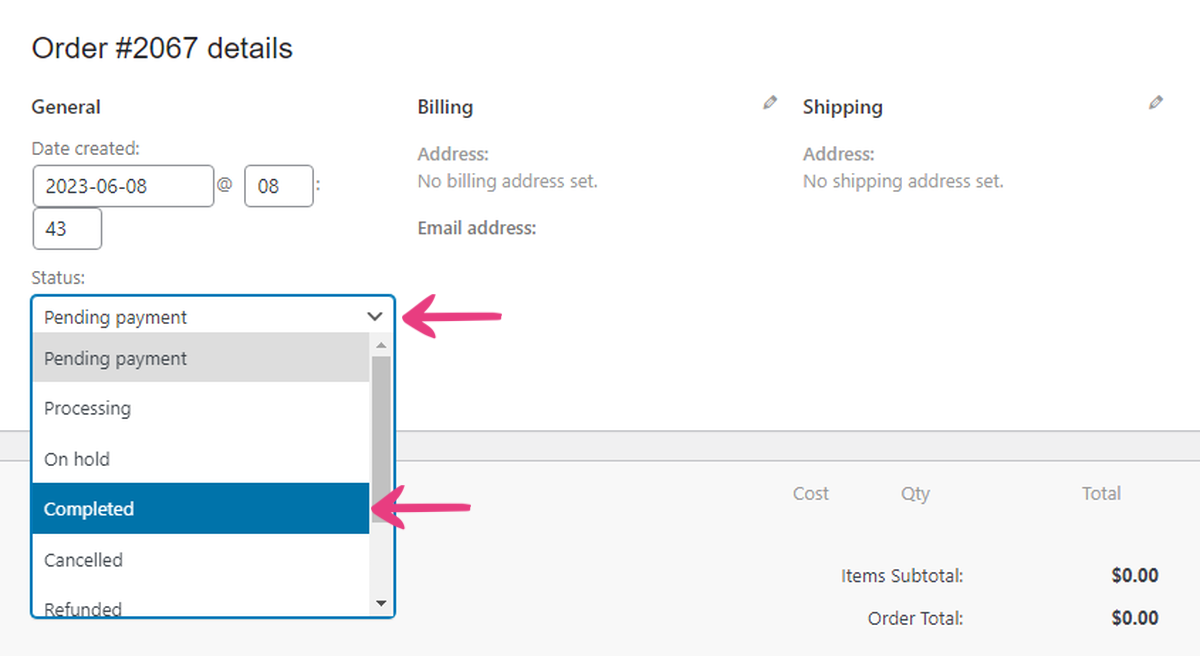
To immediately apply the manual order to your member, click the Status drop-down and choose Completed from the available options.

Customer
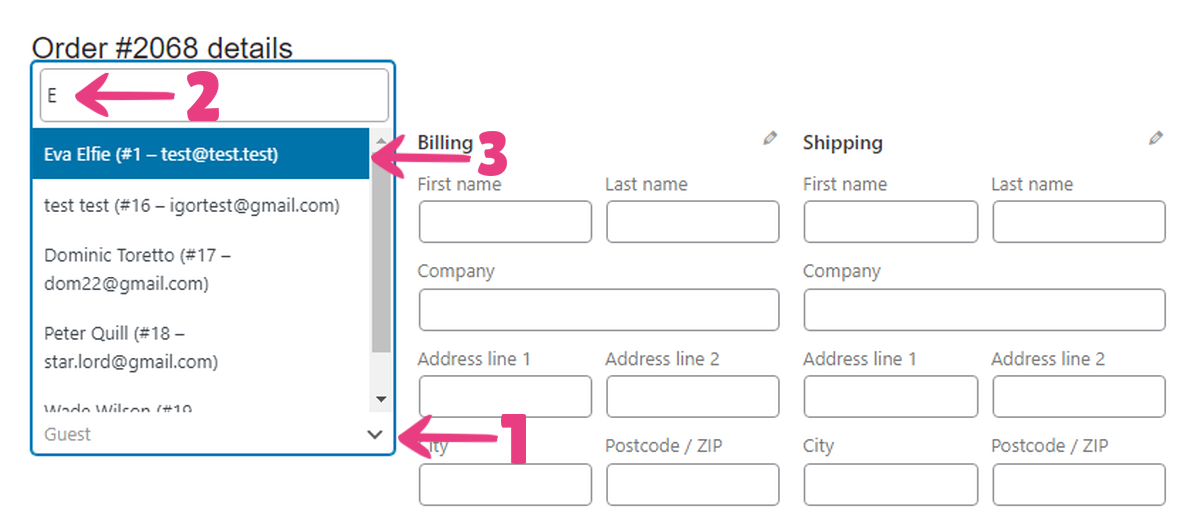
Next, click the Customer drop-down and enter the desired member’s name or email into the search field. Select their account when it appears in the results.

Products
To add a new product — in this case subscription — to the order, locate and click the Add item(s) button further down the page.

Then, click the Add product(s) button when it appears on the right.

A new window will open — Add products, in which you can search for your subscription plan. Enter the plan’s name into the Product field, select it, and click on the Add button.

Step 4
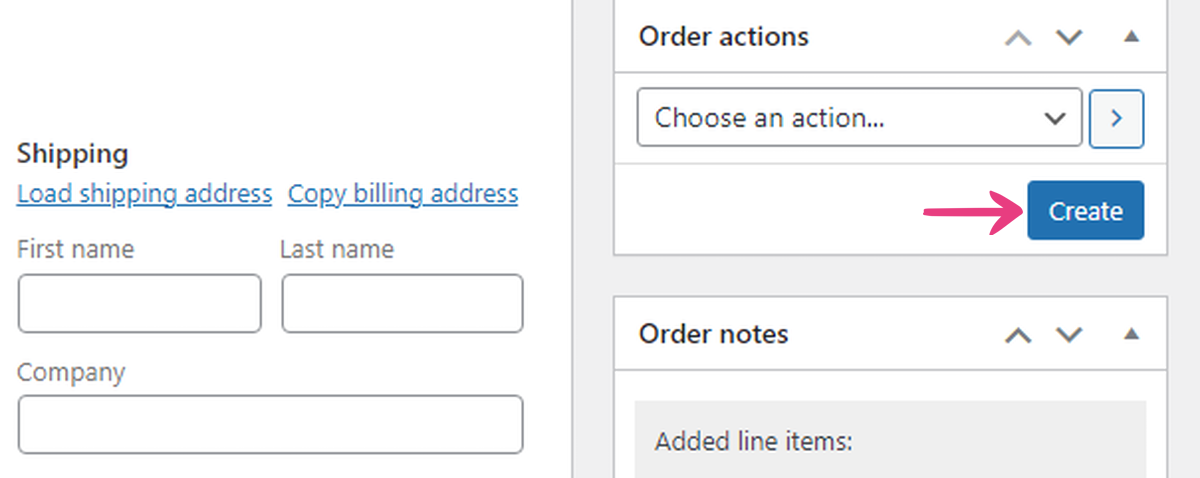
After you’ve added the desired product(s), scroll to the top and click the Create button on the right side to create the order.

The member will now have an active subscription on your website, allowing them to view your subscription-only content.


