How To Add And Customize A Hero Section (Playful Pixie)
TeaseX’s page builder lets you add a hero section anywhere on your website and customize it to your liking. This guide will take you through that process on TeaseX Playful Pixie using the homepage as an example.
Keep reading to get started.
Step 1
Log into your site by entering its domain into the browser’s address bar followed by /login and hitting enter.

On the Login page, enter your username or email into the Username or Email Address field, your password into the Password field, and click the Log In button.
Note: You can find your admin credentials in one of the support tickets in the Vicetemple client area. If you’re not sure where to find them, feel free to send us a message over live chat.
The page will reload and direct you to the admin dashboard.
Step 2
Find and select Pages in the sidebar to the left.

Then, locate the page you want to update, and click on it to begin editing.

Step 3
You can add a hero section to the page by clicking the plus icon located at the top or within one of the existing sections.

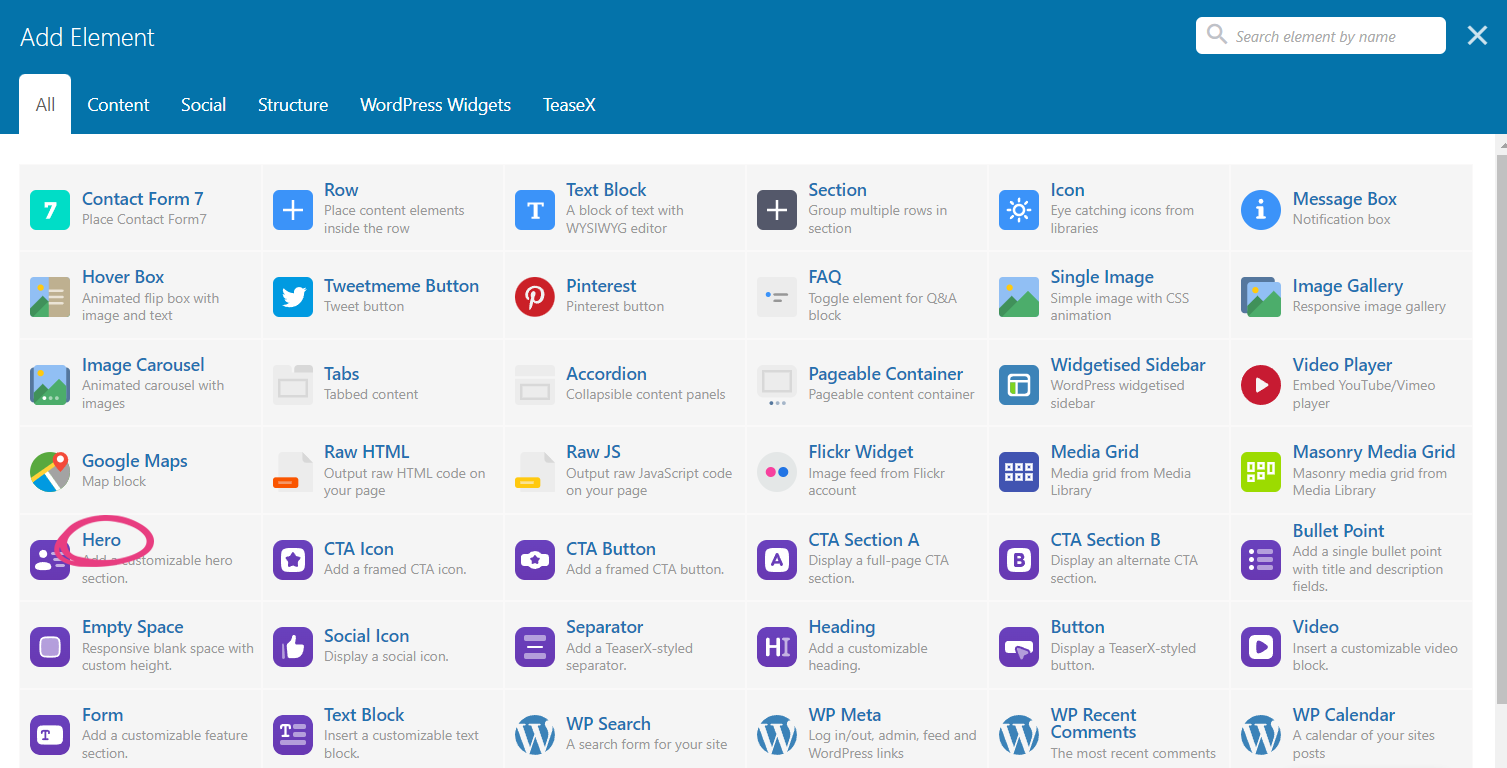
When the Add Element window appears, locate and select the Hero widget from the list.
Step 4
Selecting the widget will display a new window — Hero Settings, which comes with four default customization options and up to four additional ones.
The first option — Background media type — lets you choose between an image and a video for the section’s background. Selecting Image will display two additional options, while selecting Video will display four of them.

Below, we’re going to explain each background method, its additional option(s), as well as the remaining three default options.
Video
Opting to feature a video background under Background media type comes with the following customization options.
Add Video
You can add a video background by pasting a direct URL into the Video field or by using the media library.

If you wish to use the media library, click the Select video button below the field. This will let you choose your video from the media library or upload a new video to it.

When the new window opens, select the Upload files tab and click on Select Files to upload a video from your device.
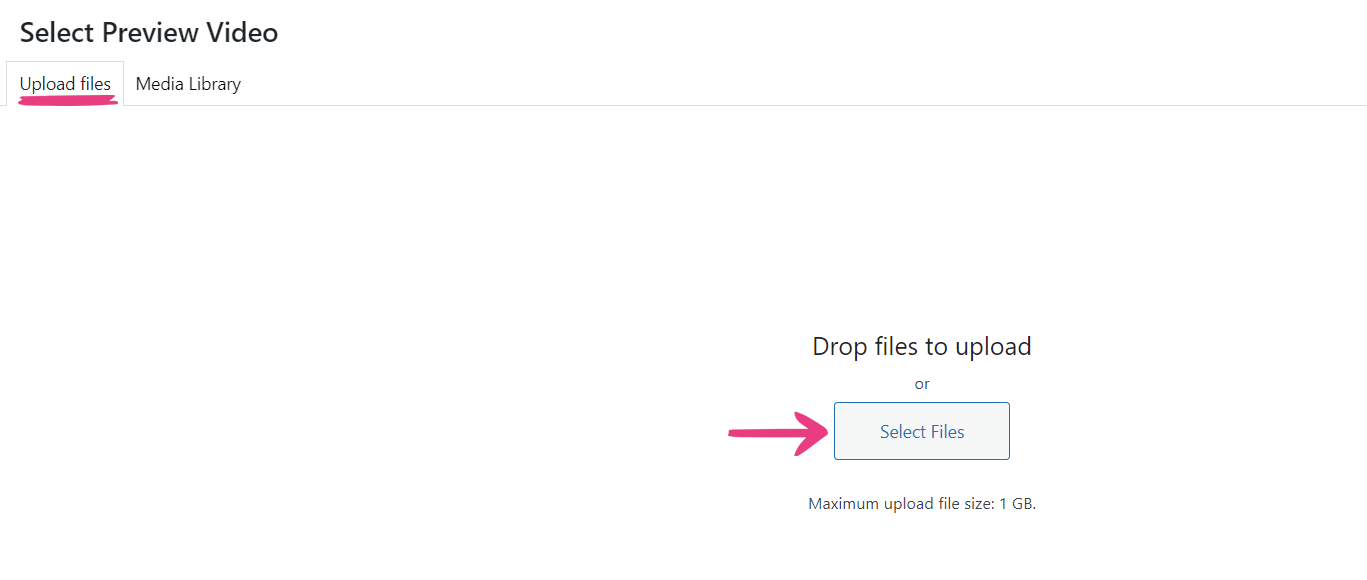
If you’ve already uploaded the video to the site, select the Media Library tab instead.
In the Media Library tab, locate and select the desired video, which will be highlighted with a blue frame and a check mark on selection.

Click on the Select button in the bottom right corner to confirm your choice.

Loop
The next option — Loop — lets you decide whether the video will play on loop. Leaving it unchecked will play it only once when the page loads.

Fade
The Fade option will fade the section’s background video into the page background. Leaving it unchecked will maintain the video’s full opacity, distinguishing it from the rest of the page — that is, the page’s background.

Here’s a preview of what the background video looks like without the Fade option enabled.
And here’s what it looks like with the Fade option enabled.
Overlay Color
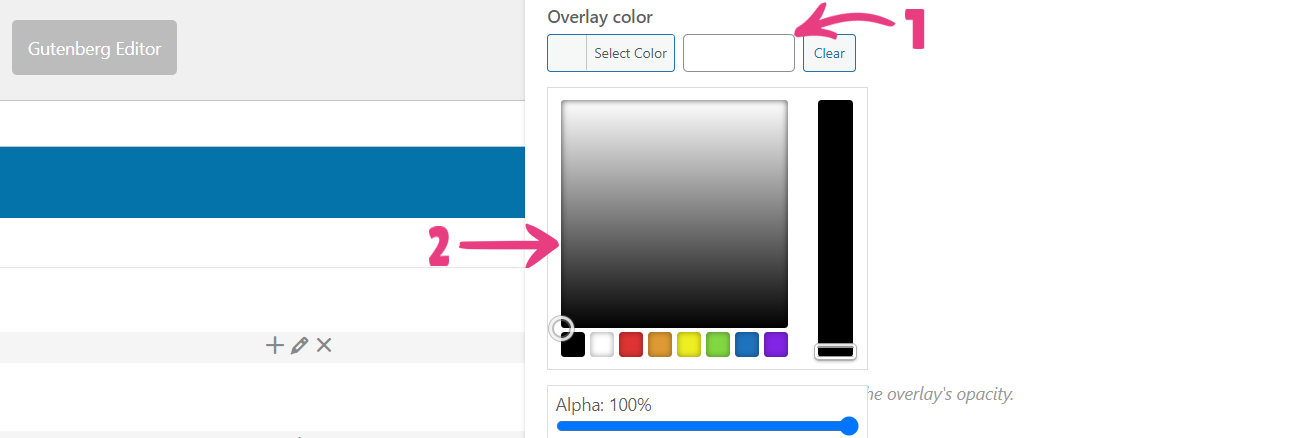
The last video-specific option — Overlay color — lets you add a color layer over your background video, in case you don’t want to show the video’s original colors or simply wish to dim it.

There are two ways to add an overlay color to the video: by pasting its hex code into the field (1) or by selecting it from the color picker (2).
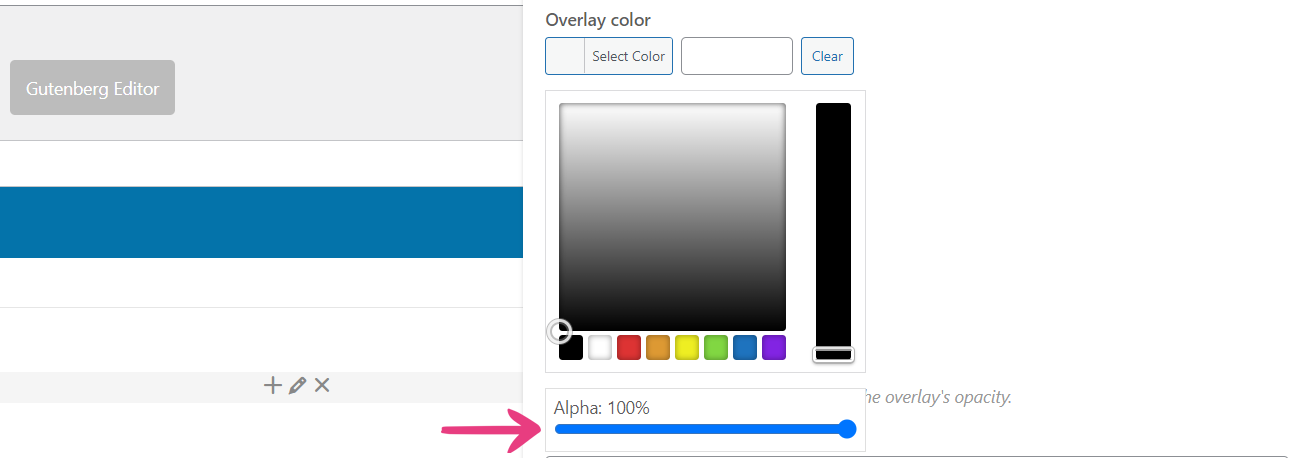
Once you’ve pasted or selected your desired color, you can use the Alpha slider at the bottom to change the color layer’s opacity. The lower the value, the more transparent that color layer will be.
Here’s a preview with the overlay color set to mid opacity (55%).
And here’s a preview with the overlay color set to high opacity (80%).
Image
If you choose to add an image background, two new options will be shown — Background image and Background zoom (mobile).
Background Image
To add the image background, click on the Background image option’s plus icon. Then, repeat the instructions on selecting or uploading a file to the media library under Video to select your image file.
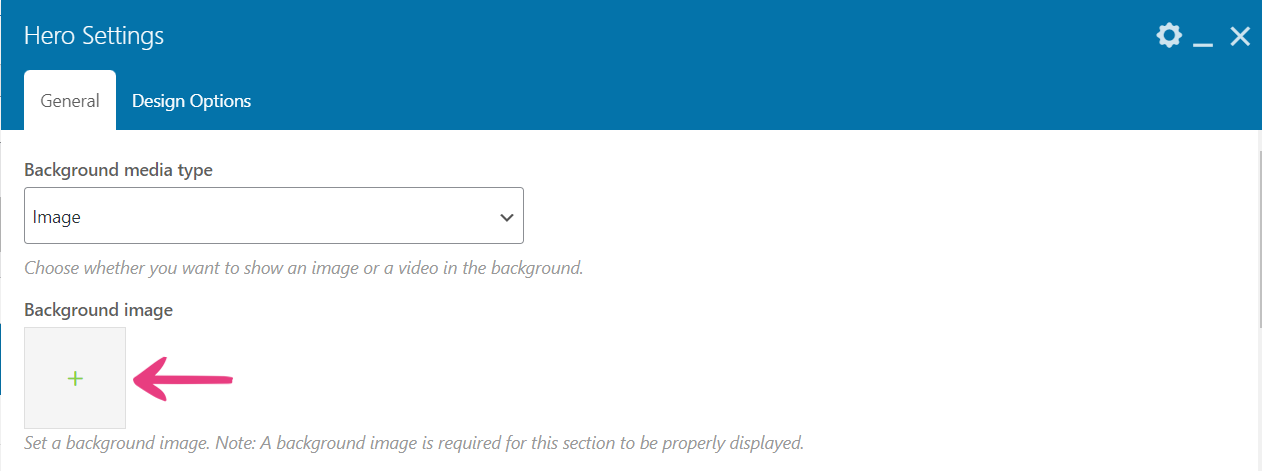
Note: The minimum recommended width for both image and video backgrounds is 1920 pixels.
Background Zoom
Select the zoom level from the Background zoom (mobile) option’s drop-down menu, which will zoom into the image by that degree on mobile devices. Alternatively, leave the option unchanged to apply the default value.

Default Options
After you’ve configured your video or image background for the section, it’s time to configure the default options. They will be explained below.
Title
Enter a title into the Title field, which will be shown centered over your hero section.

CTA Button
The CTA Button checkbox lets you display a custom button centered below the title. Enabling it will display a new option underneath — Link — to set where that button will direct.

Link
To configure the custom button, click on Select URL under Link, after which a window called Insert/edit link will appear.

Enter the destination link for your button into the URL field (1), the text that will be shown over the button into the Link Text field (2), and choose whether the link should open in a new browser tab by checking the Open link in a new tab option (3).

Leaving the option unchecked will open the link in the same browser tab.
Once the button’s link is configured, click on Set Link to apply it.

Finally, click on the Save changes button at the bottom of the Hero Settings window to add the section to the page.

Step 5
To save the changes and make them live, click on the Update button.

Your new hero section will be immediately visible on the website.


