How To Customize The Age Verification Gate
TeaseX allows you to easily customize every section of your website. That includes setting up and fine tuning an age verification gate — a page or pop-up that asks first-time visitors to confirm that they are old enough to browse the site before showing them any explicit content.
Keep reading to learn how the process works.
Step 1
First, log into your site by entering its domain into the browser’s address bar followed by /login and hitting enter.

Note: You can find your admin credentials in one of the support tickets in the Vicetemple client area. If you’re not sure where to find them, feel free to send us a message over live chat.
On the Login page, enter your username or email into the Username or Email Address field, your password into the Password field, and click the Log In button.

Step 2
The page will reload and direct you to the main dashboard of the admin area. There, click on Theme Options in the top menu bar.

Step 3
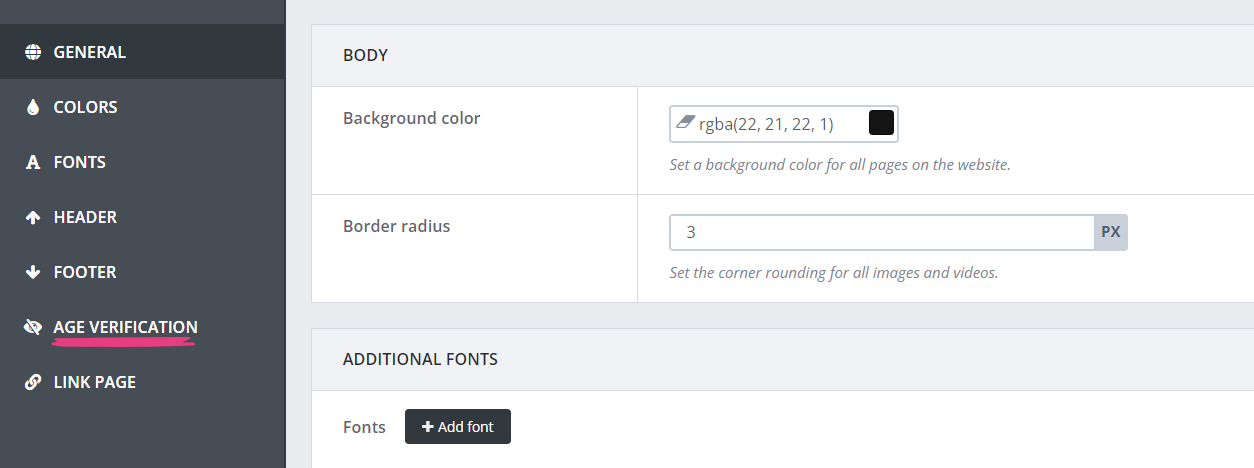
On the Theme Options page, locate and click on the Age Verification tab on the left side.

Step 4
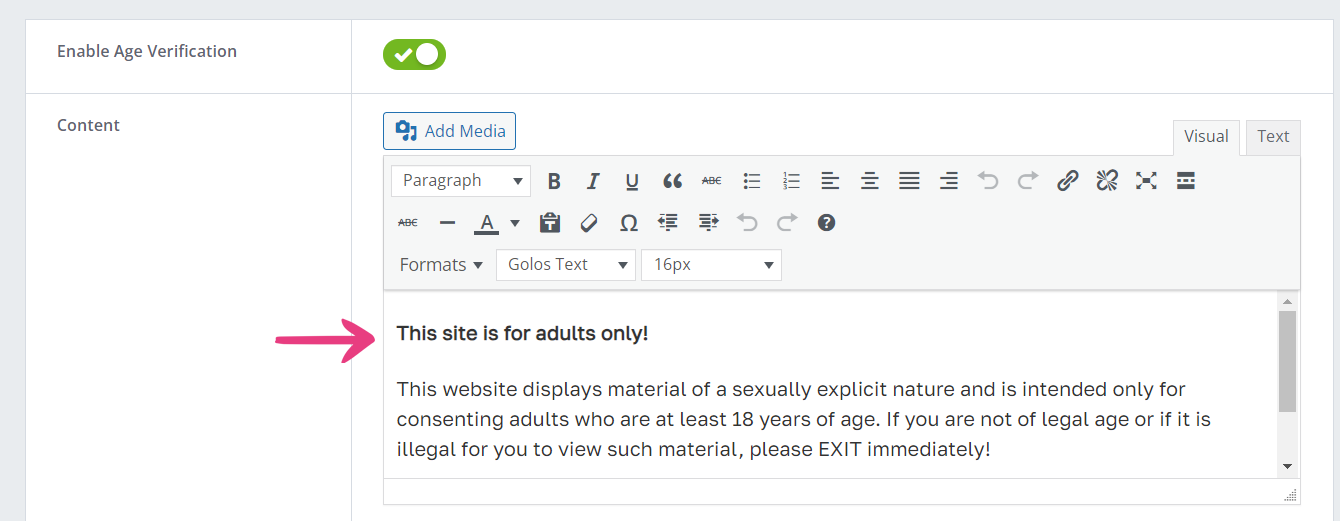
The Enable Age Verification switch allows you to easily enable or disable the age verification gate. By default, the option is set to Enabled, as shown below.

You can edit the age verification gate’s content using the Content section, which employs a standard text editor that supports numerous features, including, but not limited to, text formatting, media files, and links.

The Enter text section allows you to customize what will be shown on the button that lets users verify their age and proceed to the site.

The Leave text field lets you specify the text that will be shown on the button that navigates users away from the site when they refuse to verify their age.

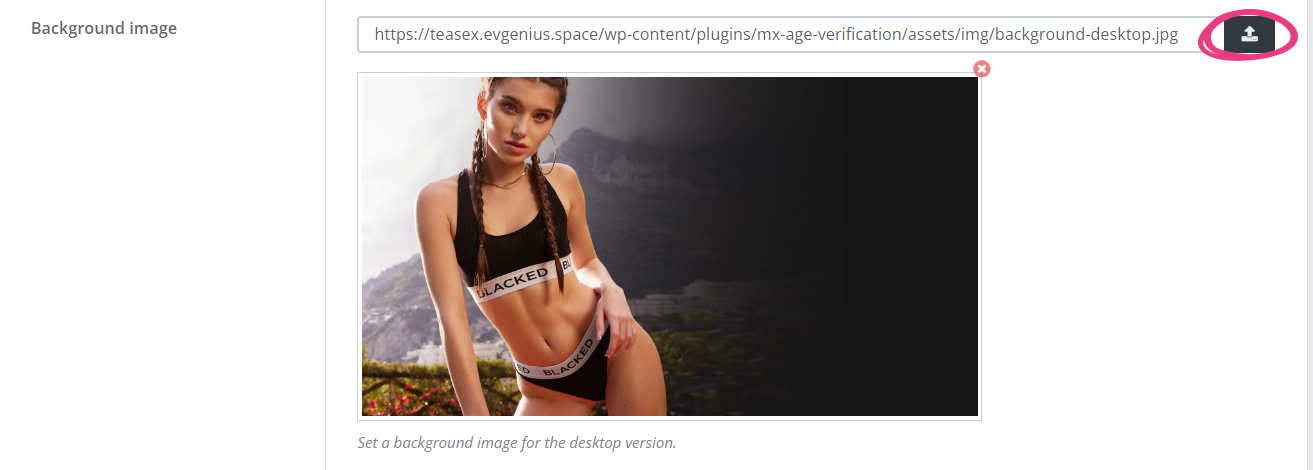
You can also configure an image to be displayed as the background of the age verification prompt. To start that process, click on the Upload Image field.

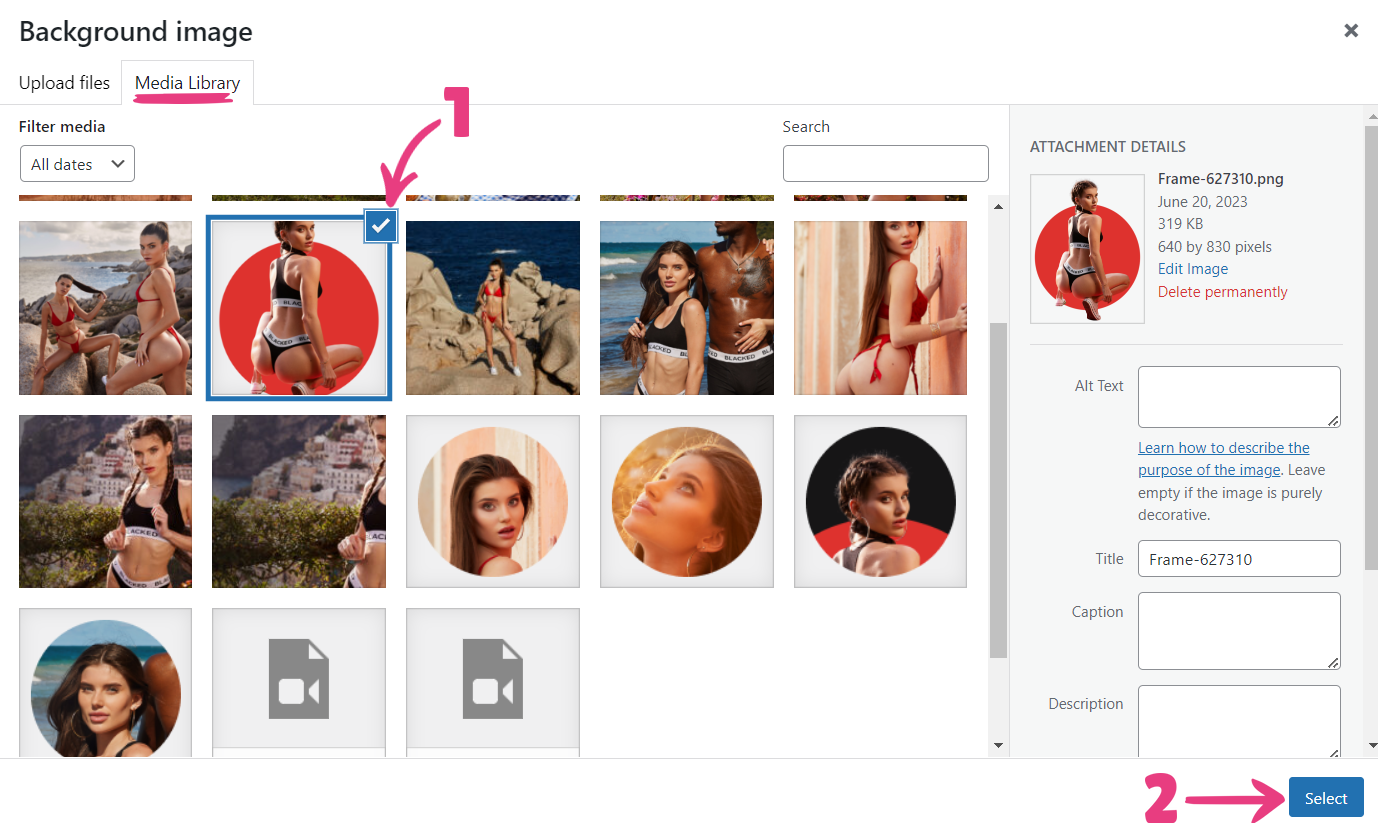
Next, you can drag and drop an image from your device to upload it to the Media Library or click an existing image from the library to pick it. Your selected image will be highlighted with a blue frame and a check mark. Press Select to confirm your choice.

To recolor the background of your age verification gate, you can use the Background Color section. Simply enter the hex, RGB, or RGBA code of your preferred color or click on the colored square to pick a hue from the color wheel.

Step 5
Once you finish configuring all the settings, press the Save Changes button at the top.

Your age verification gate will be updated and shown to all visitors when they first open your website.

Step 6 (Optional)
If you want to disable the Age Verification Gate, navigate back to the Age Verification page and set the Enable Age Verification switch to Disabled.

Then, just click on Save Changes at the top.

With that done, first-time visitors will be directed straight to the homepage of your TeaseX website without any confirmation requirements.


