How To Change The Default Currency
ModelX features an intuitive way for changing the default currency on your website. Consult this guide to learn how to use the function.
Step 1
Navigate to your website and log in with your admin account. Click the member icon in the top right corner of your website to access the login area.

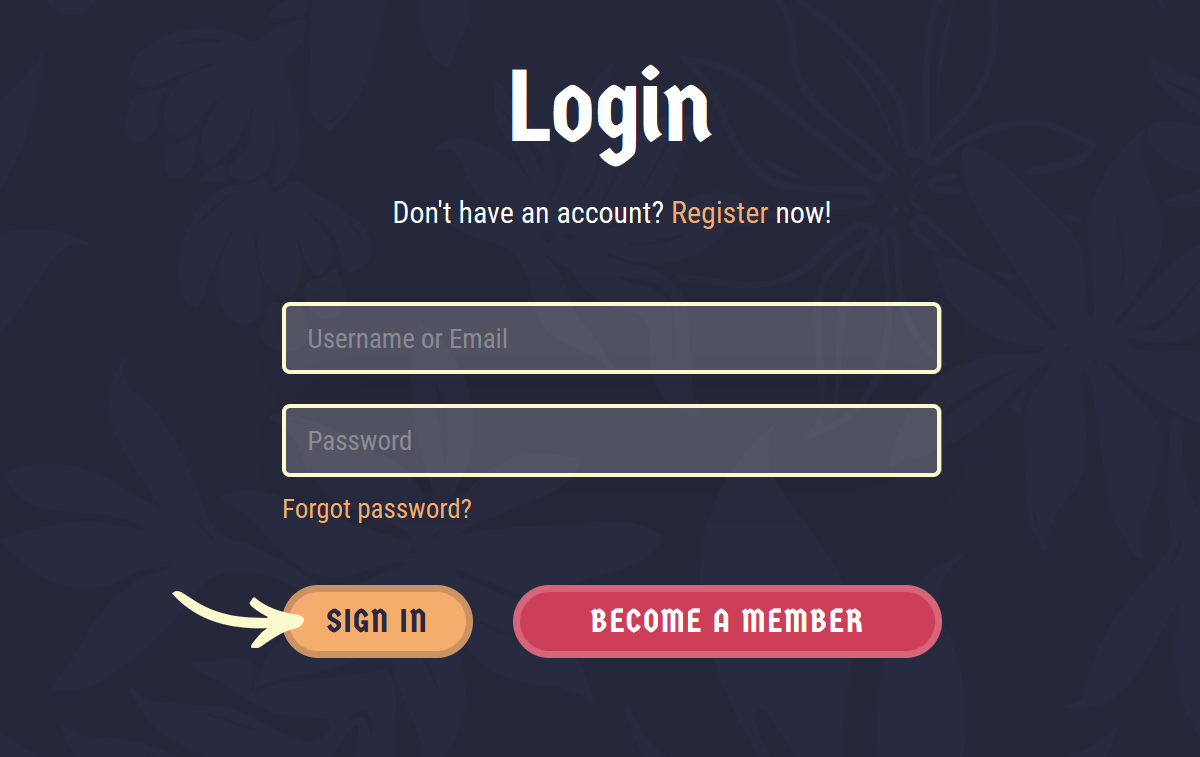
After clicking the icon, you will find yourself on the Login page. Enter your Username or email into the Username or email field, your password into the Password field, and press Sign in.
Note: You can find your admin login details in one of the support tickets in the Vicetemple client area. If you’re not sure where to find them, feel free to send us a message over live chat.
Step 2
Once you’re logged in, hover over the website name in the admin toolbar at the top, and click Theme Dashboard in the drop-down menu.

Step 3
Hover the WooCommerce tab on the Theme Dashboard page.

A drop-down menu will expand. Click on the Settings option in it.

Step 4
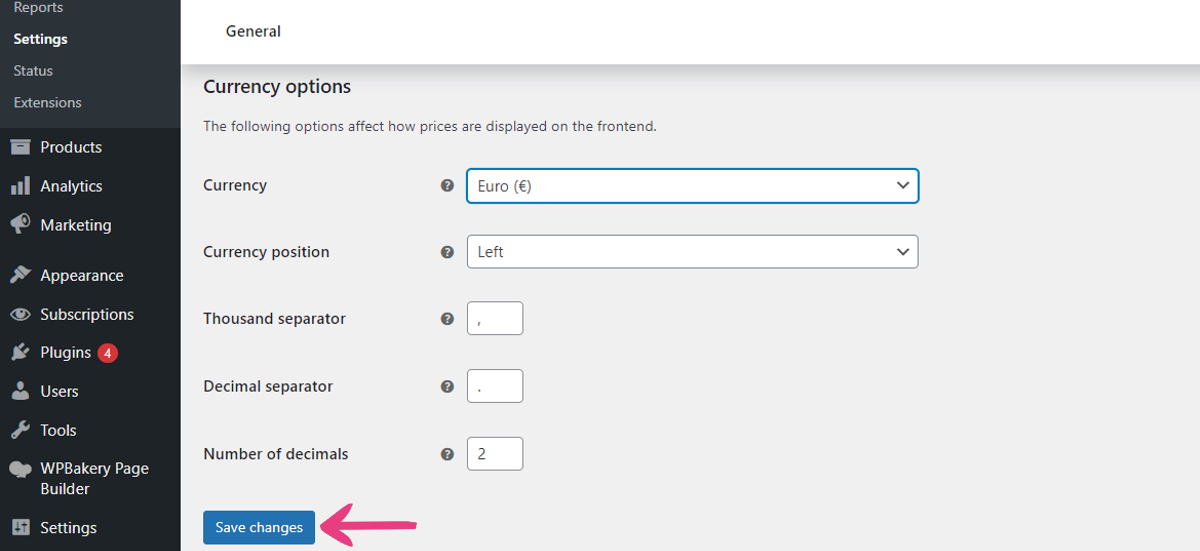
Make sure that you are on the General tab in the menu.

Scroll down and find the Currency field.
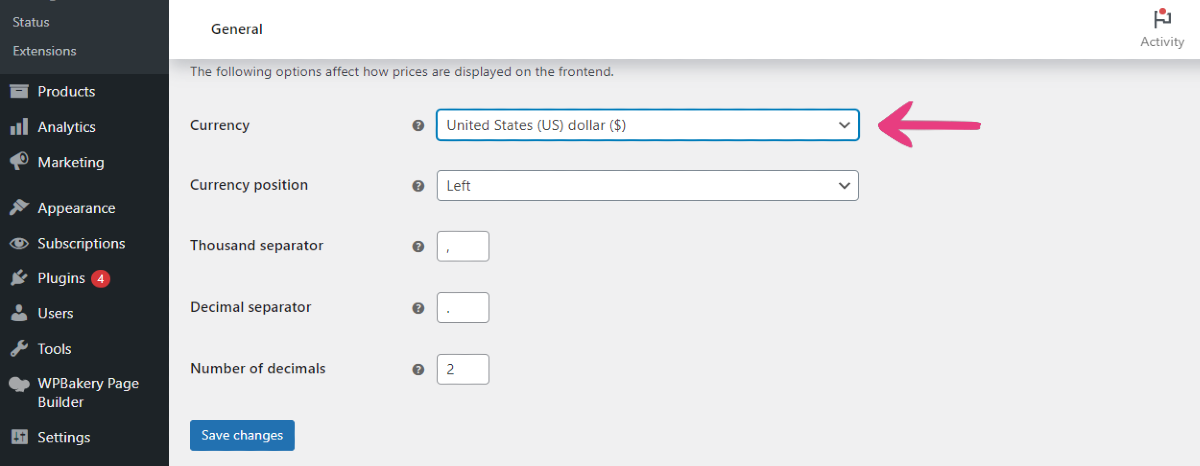
Click on the offered currency to open a drop-down menu.
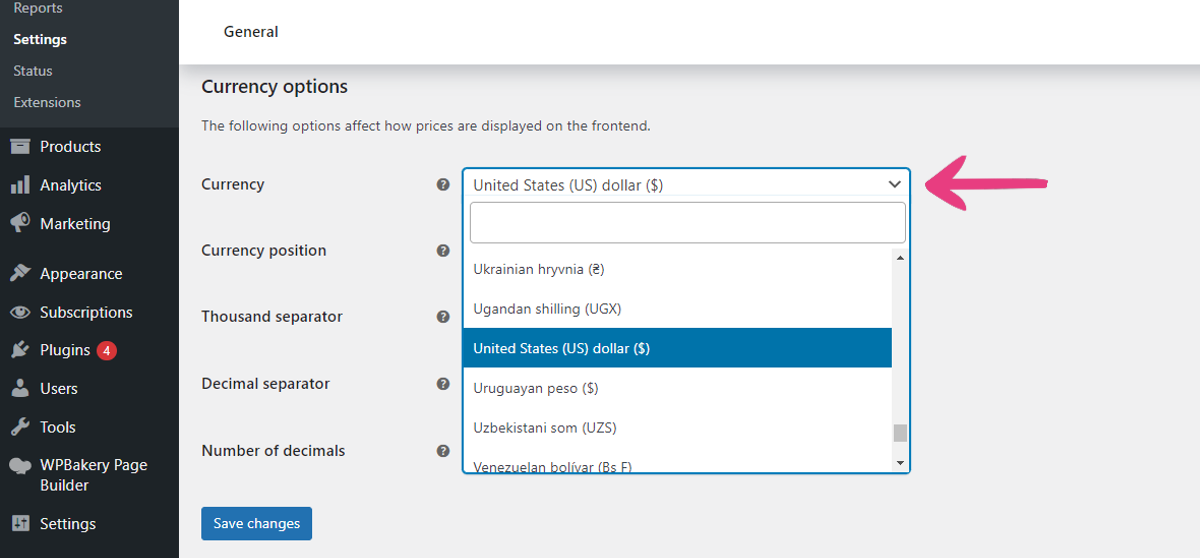
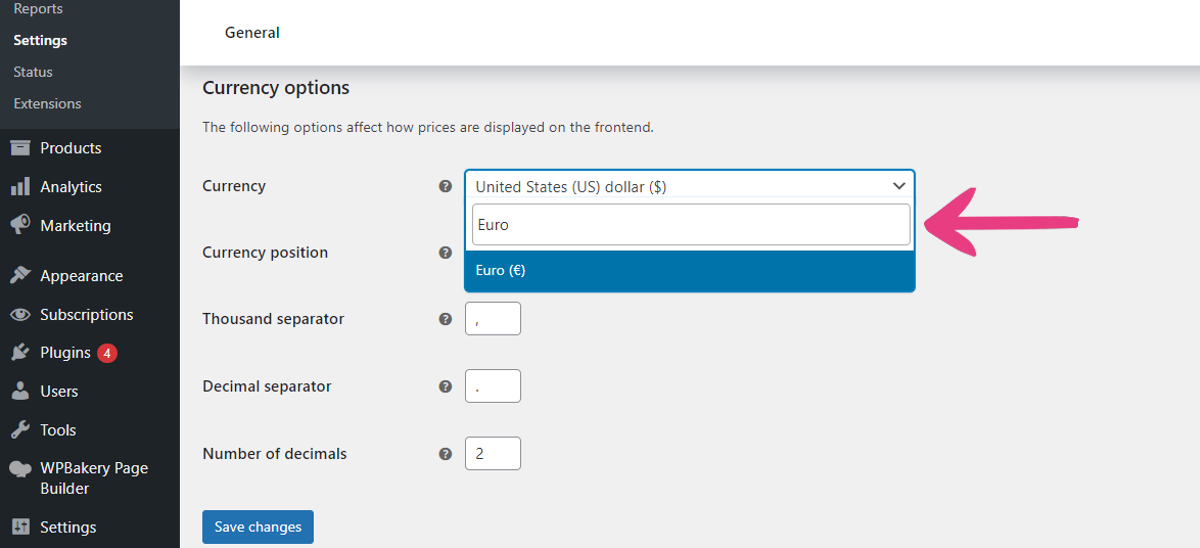
Enter the currency you wish to use in the blank field and select it when you find it.
Step 5
When you have selected your desired currency, click the Save changes button at the bottom to apply your choice.
Once you save the changes, all the product prices across the entire site will be updated and shown in the selected currency.


