How To Edit The PornX Main Menu
PornX is the most advanced WordPress theme for porn websites, and it allows you to easily customize your main menu by:
- Adding new links
- Editing existing links
- Removing links
- Adding icons to links
- Creating nested menus
Follow the steps below to learn more.
Step 1
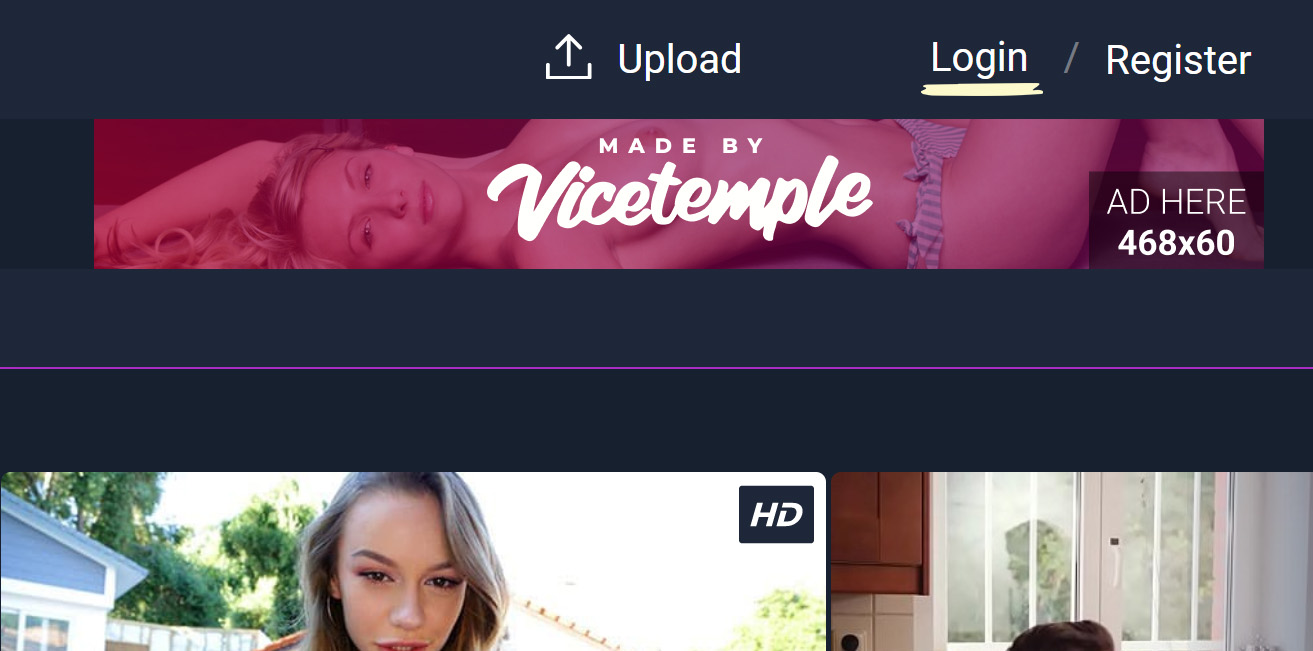
Navigate to your website and log in with your admin account. The Login option is located in the top right corner of your website.
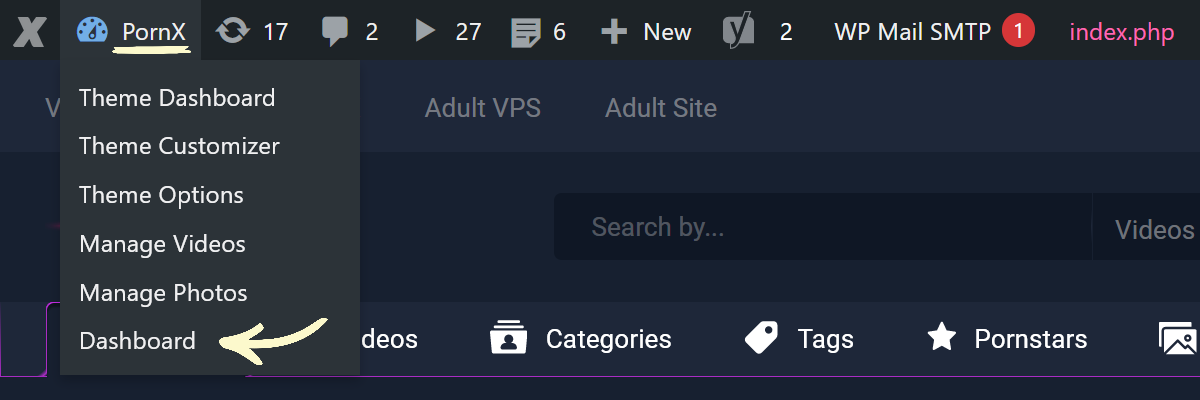
Once you are logged in, hover over your website’s name in the top left corner of the admin toolbar, and click Dashboard when the menu appears.
Step 2
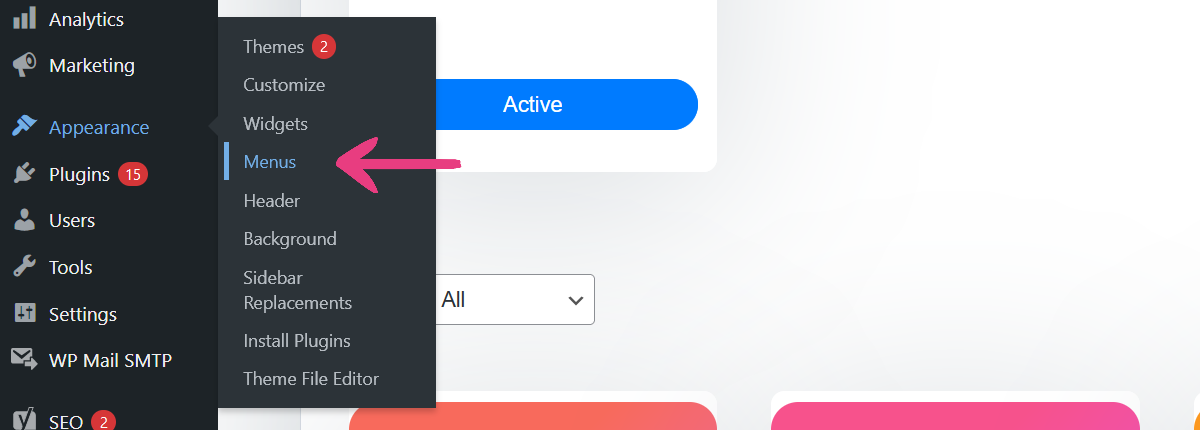
Scroll down the page and locate the Appearance option in the sidebar on the left, hover over it, and select Menus when the menu expands.
After the page loads, make sure that you have Main Menu (Main Menu) selected under the Select a menu to edit option. If it’s not displaying, choose it from the drop-down list and click Select.

Step 3
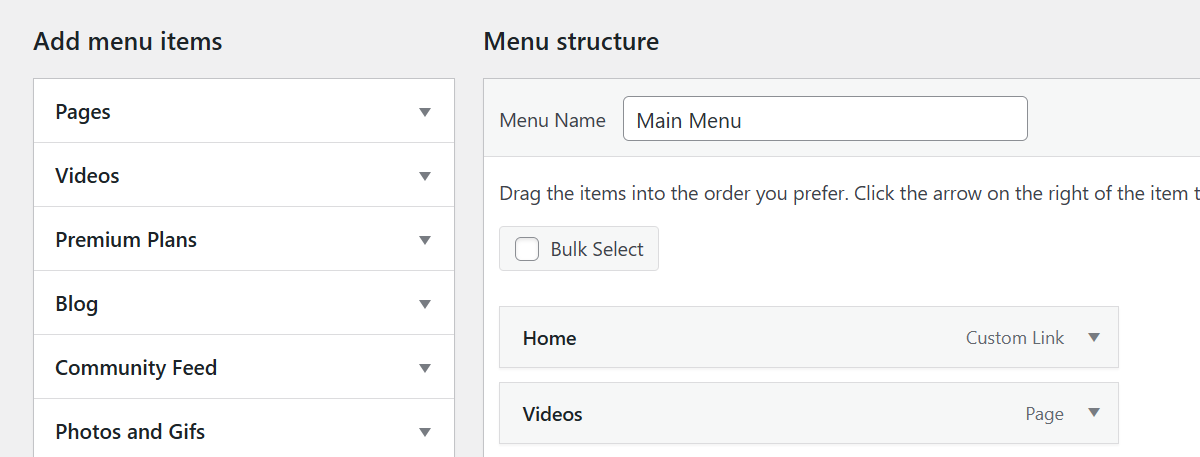
Below the select option, there are two sections: Add menu items and Menu structure, in which you can add new links to the main menu and edit the existing ones, respectively.
Add New Links
The Add menu items section will let you link to any existing page, video, album, or post from the main menu, as well as add custom links.
Link Page, Video, Album, or Post
To add a page, product, or post, expand its corresponding group by clicking on the arrow.

Then, tick the checkbox next to that page, video, album, or post, and click on the Add to Menu button.
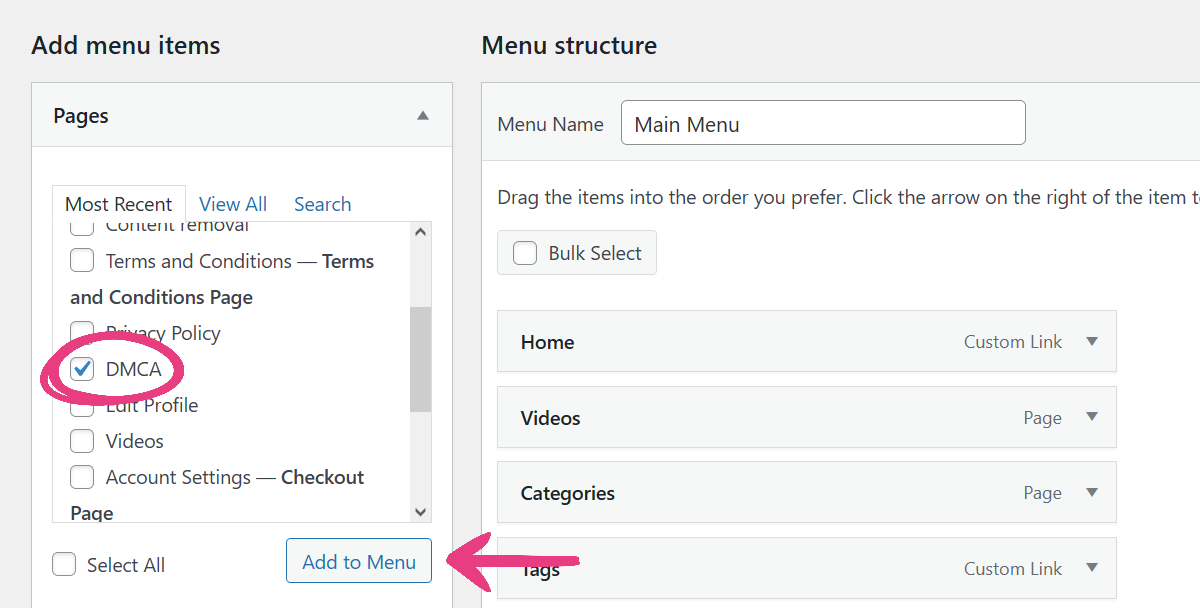
Add Custom Link
To add a custom link, locate and expand the Custom Links group.

Then, enter the custom link and the link text that will be shown in the menu into the URL and Link Text fields, respectively. With that done, click on the Add to Menu button.
Edit Existing Links
You can rearrange the existing main menu links by dragging them in the Menu structure section. In addition, you can change a link’s properties by clicking on the arrow icon.
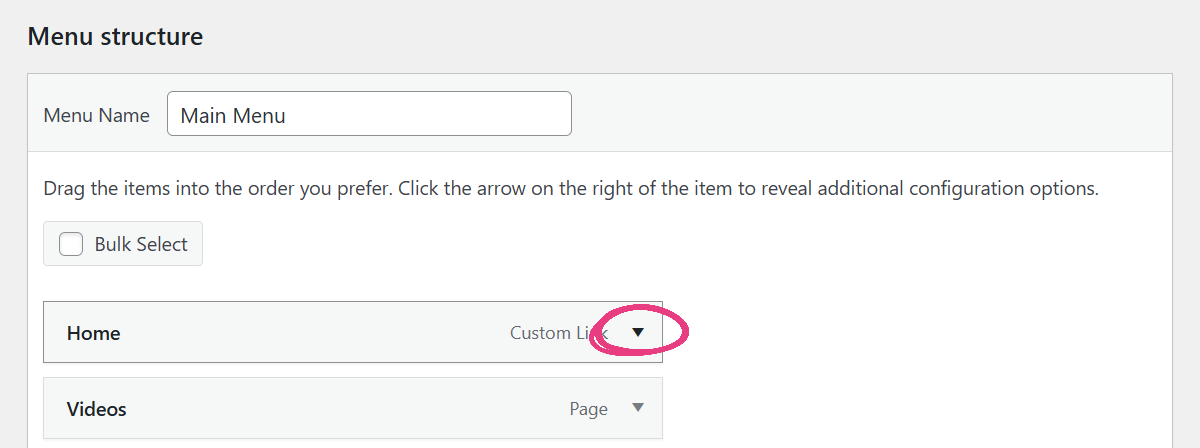
You can change a custom link’s URL and displayed text in the URL and Navigation Label fields, respectively. For linked pages, videos, albums, and posts, you can only change the text.

All links added to the main menu share the following options:
Link Title
You can add a title for each link and provide additional information about the linked page, which you can enter into the Title Attribute field. This field is optional.

The Title Attribute will be shown to your website visitors when they hover over the link in the main menu.

New Tab
Ticking the Open link in a new tab checkbox will have the link open in a new tab when your visitors click on it.

Additional Styles
The CSS Classes field can be used to apply extra styling to the main menu link and change its icon. Only classes that exist in the website’s code will work.

The PornX theme comes with eight built-in icons that you can use in the main menu:
- Home icon with the class home-icon
- Play icon with the class video-icon
- Stacked folder icon with the class cat-icon
- Tag icon with the class tag-icon
- Star icon with the class star-icon
- Image icon with the class photo-icon
- Users icon with the class user-icon
- Letter B icon with the class blog-icon
Entering any of these classes into the field will display its icon in the main menu, left of the selected link.
![]()
Create Nested Menus
To create a nested drop-down menu that will appear to your visitors when they hover its name, add a custom link — as described under Add Custom Link — and enter only the hashtag symbol (#) into the URL field.

Then, follow the instructions under Link Page, Product, or Post and Add Custom Link to include the links you want in the drop-down menu.
Once you’ve added all your links, locate them in the Menu structure section and expand the first one.

Locate and click the Under <nested menu name> link below the CSS Classes field, which will nest it under the link above.
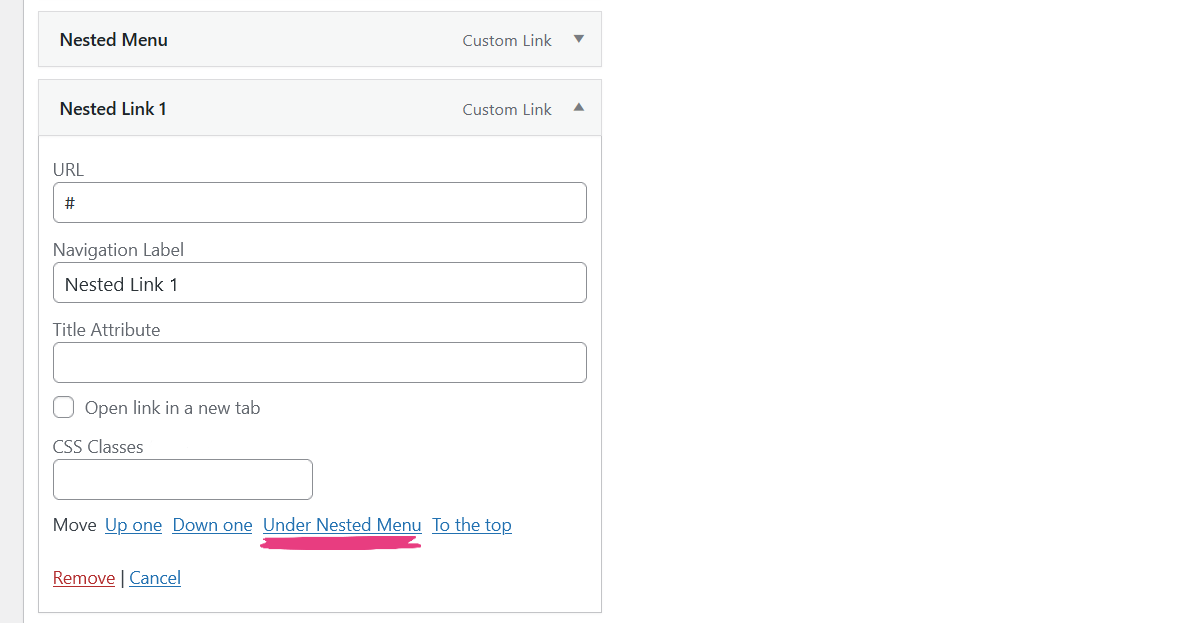
Repeat the process for all subsequent links until they are all nested.

Step 4
After applying all the desired changes, click Save Menu to confirm the changes and display them on your website.


