How To Increase The PHP Max Upload Size Via FTP
Your website’s PHP configuration limits your ability to upload files. For security reasons, the maximum file upload size is set to 1 GB by default. However, you can always increase that limit if you would like to upload larger, higher-quality videos.
This article will explain how to increase the PHP maximum upload size by using FTP. If you’d like to know how to increase the maximum upload size limit in a different control panel, check out our guides on how to do it through cPanel, Plesk, Hestia, or aaPanel.
This article will describe the simplest method of increasing a website’s upload limit via FTP: by editing the .htaccess file with the FileZilla FTP client. Other recommended FTP clients include WinSCP and Cyberduck.
Note: There are several other, more complex methods of changing PHP directives. If you want to use one of them but aren’t sure how or if the option is supported, feel free to create a support ticket through Vicetemple’s client area.
Step 1
Start the FTP client, enter your web server’s credentials into the Host, Username, and Password fields, and click Quickconnect. You may leave the Port field empty. If you need to enter a port for some reason, 21 is the most common choice.

Once it is connected to the server, the FTP client will show a list in the right panel, under Remote site.
Locate and enter the web folder in the list.
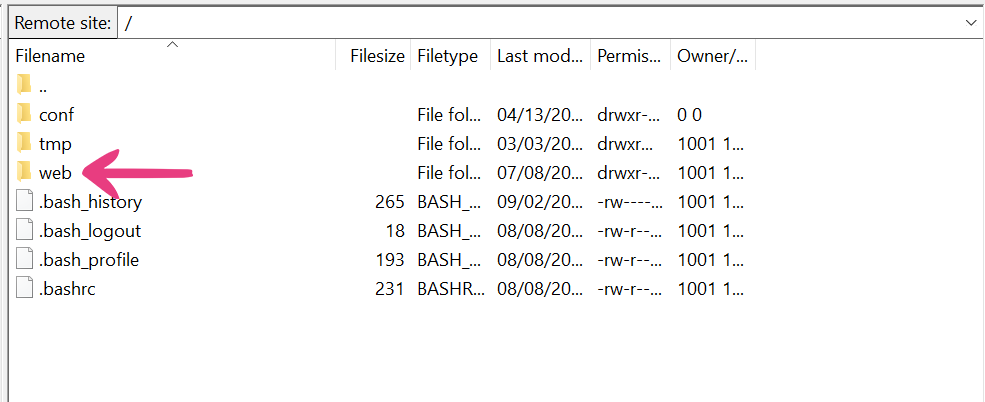
Then, locate and enter the folder named after the domain or subdomain hosting your copy of the PornX theme.

Next, locate and enter the selected website’s public_html folder.

Finally, locate and right-click the .htaccess file, and select View/Edit.
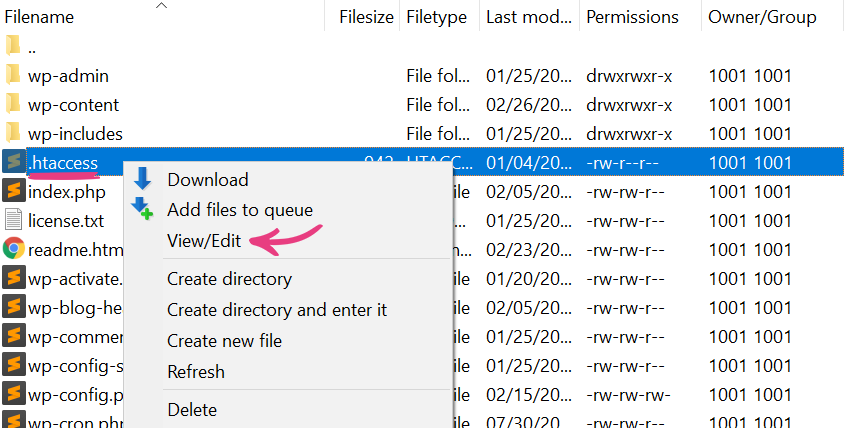
Note: We recommend installing Notepad++ before modifying any files on your web server. Once you select View/Edit, a prompt will ask you which program you want to open the selected file with. Choosing Notepad++ will set it as the default option for current and future updates to your web server’s files.
Step 2
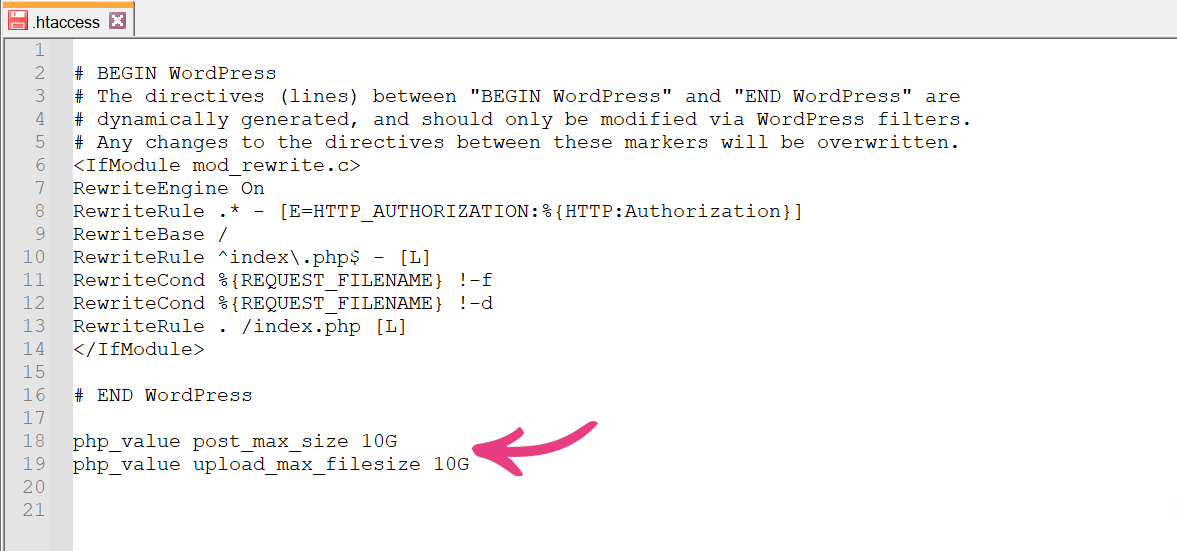
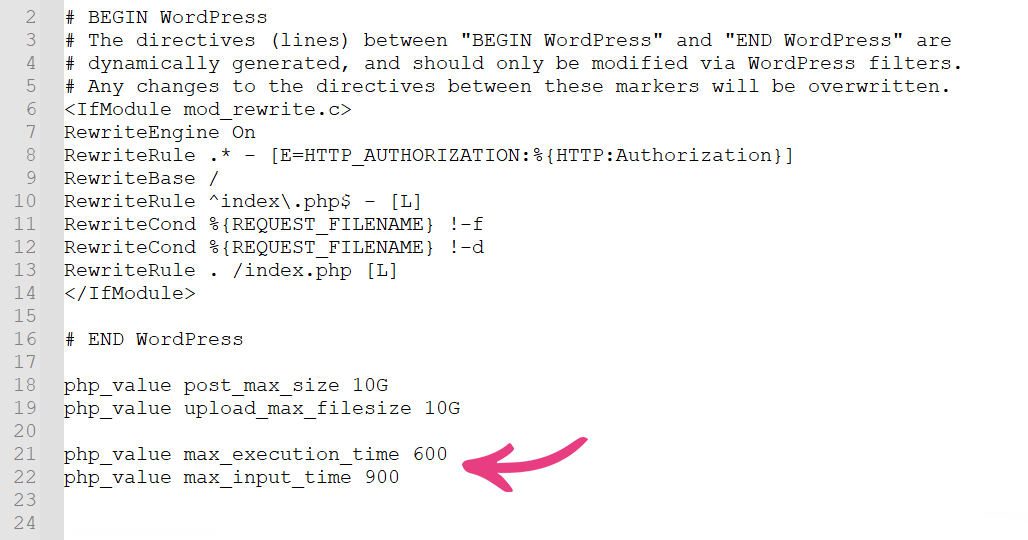
Add the following lines at the bottom, below # END WordPress, and replace “1G” in both of them with what you want your new upload limit to be:
php_value post_max_size 1G
php_value upload_max_filesize 1G
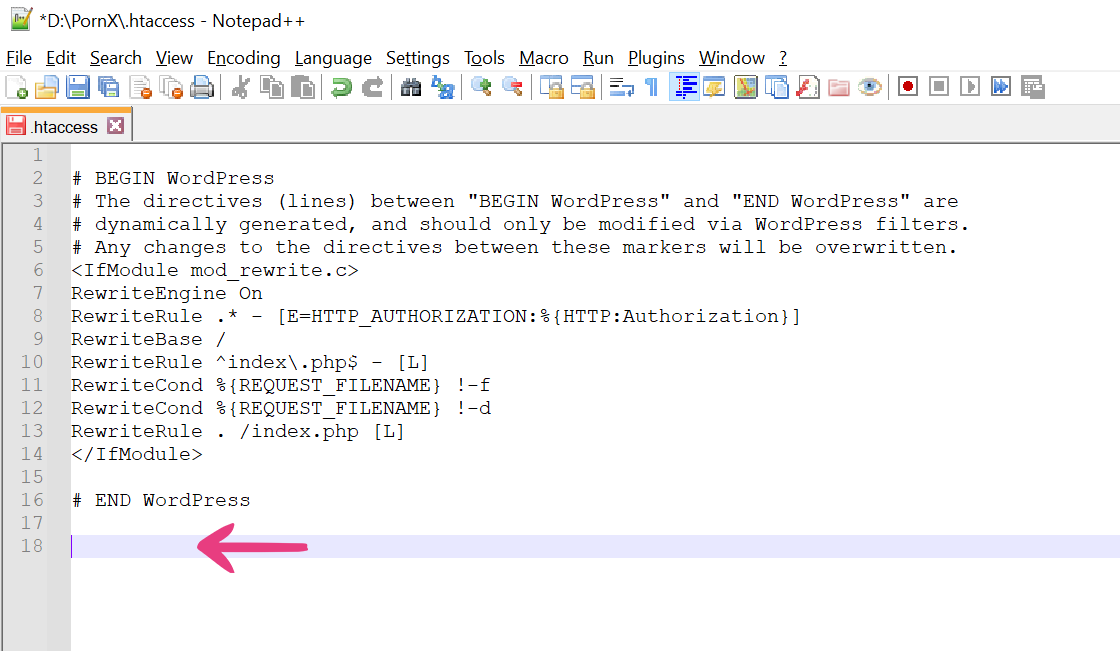
Note: K (kilobyte), M (megabyte), and G (gigabyte) are the only accepted measurements. If you use measurements like kb, Mb, or GB, your changes will not be applied on the website.
For example, if you want a 10 GB maximum file size limit, you should change the values to 10G.
Step 3
For your website to have enough time to process large files before timing out, you will need to add the following lines and replace “60” and “90” in both of them with your desired values:
php_value max_execution_time 60
php_value max_input_time 90
If the values for these directives remain low and you attempt to upload a large file, the upload may be interrupted. That is why we recommend scaling the available time with file size limits.
For example, if you increase the upload limit by ten, you should multiply the max time directives by the same value. Therefore, if you increase the upload limit from 1 GB to 10 GB, the max execution and input time values should be increased from 60 and 90 seconds to 600 and 900 seconds, respectively.
Step 4
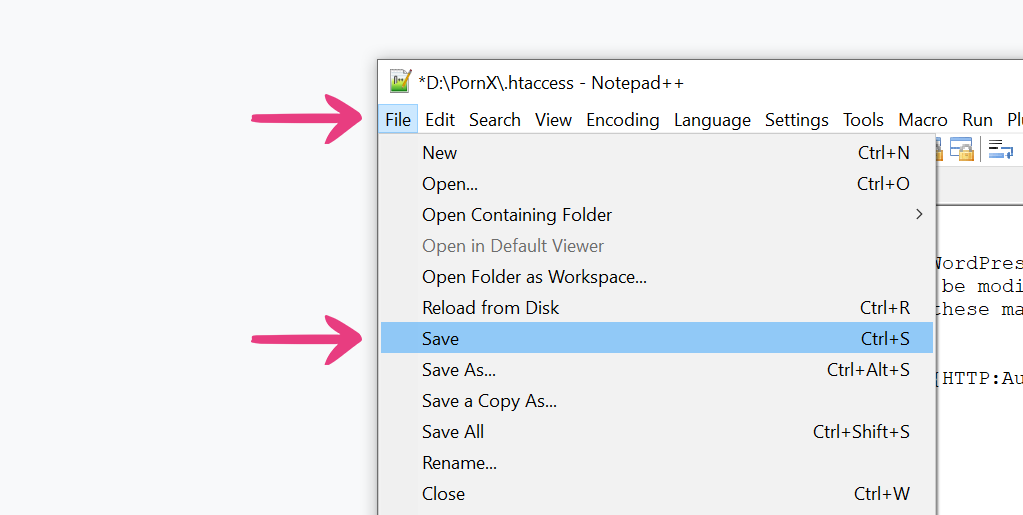
Click File in the top right corner and select Save, or press Ctrl + S on your keyboard to save the changes.
After closing the file, your FTP client will notify you that the .htaccess file was modified, and ask whether you want to upload it back to the server. Click Yes in the pop-up window.
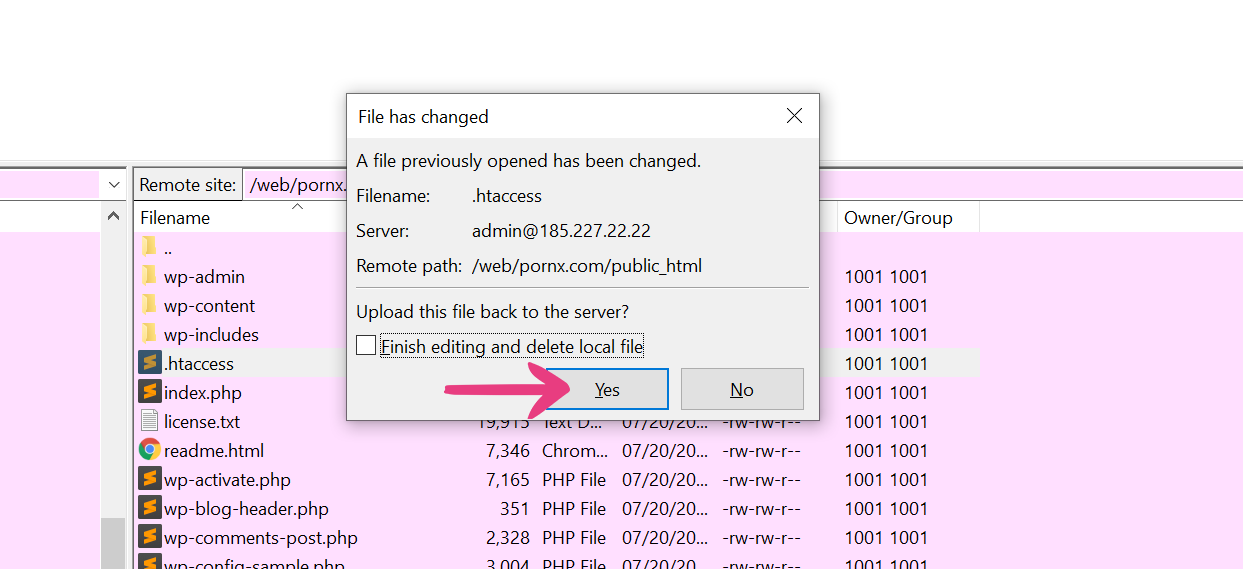
The client will take a second to upload the file to the server. After the upload is finished, the new upload limits will take effect on your website.


