How To Configure The Parallax Widget
The ModelX theme comes with a Parallax widget that lets you set up to three image layers, creating a sense of depth when your visitors scroll through the page.
In this guide, we’ll be using the homepage’s default parallax as the example, but keep in mind that a parallax can be added to any page on your website.
Keep reading to learn how to use the feature.
Step 1
Navigate to your website and log in with your admin account. Click the member icon in the top right corner of your website to access the login area.

After clicking the icon, you will find yourself on the Login page. Enter your username or email into the Username or Email field, your password into the Password field, and click Sign in.

Note: You can find your admin login details in one of the support tickets in the Vicetemple client area. If you’re not sure where to find them, feel free to send us a message over live chat.
Step 2
Once you’re logged in, click on the website name in the admin toolbar at the top.

Then, click on Pages in the sidebar to the left.

Step 3
Find and click on the page that you wish to edit.

Step 4
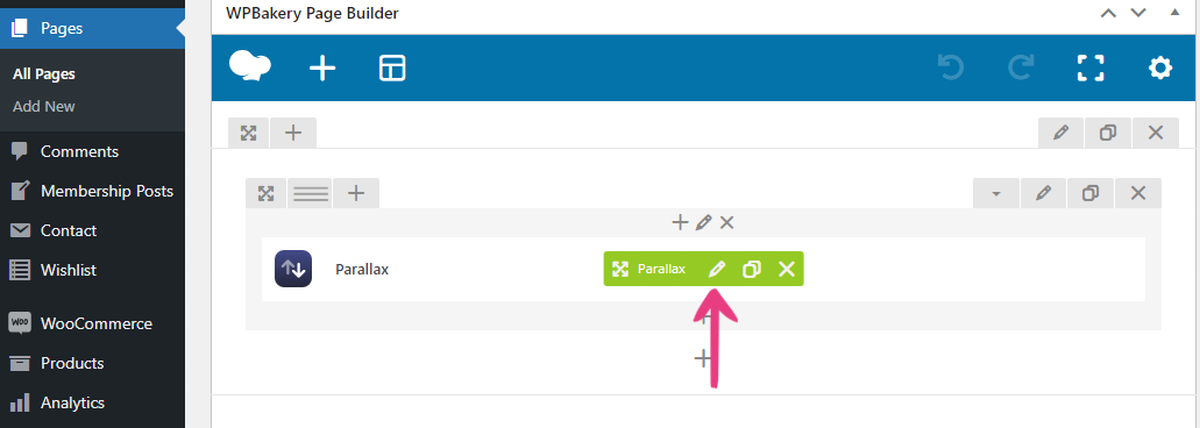
To edit an existing Parallax widget, locate it in the page builder, hover over it, and click on the pencil icon when the option appears.

If you wish to add a new parallax to the page, you can do it in two ways: by clicking the plus icon at the top of the page editor and by clicking the plus icon located within an existing section or row.

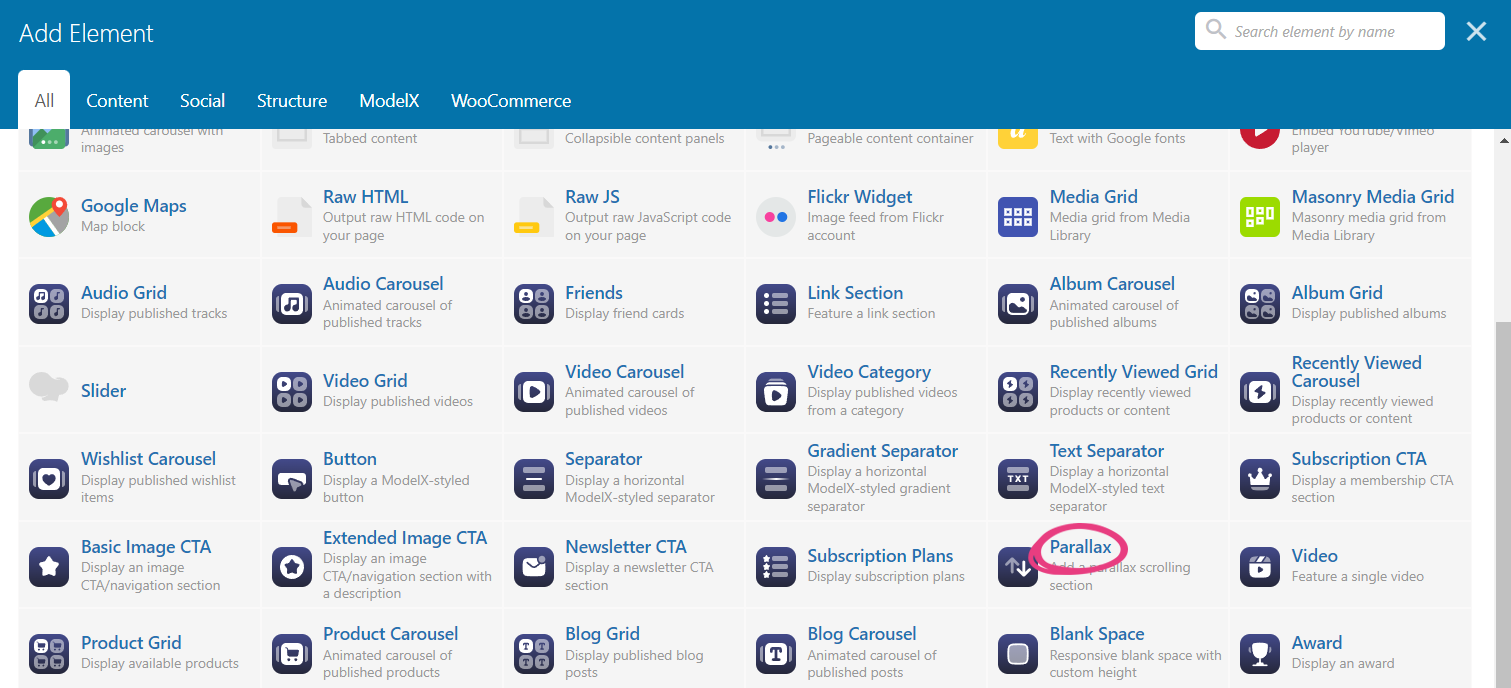
After clicking one of the icons, locate and choose the Parallax widget when the Add Element window appears.

Step 5
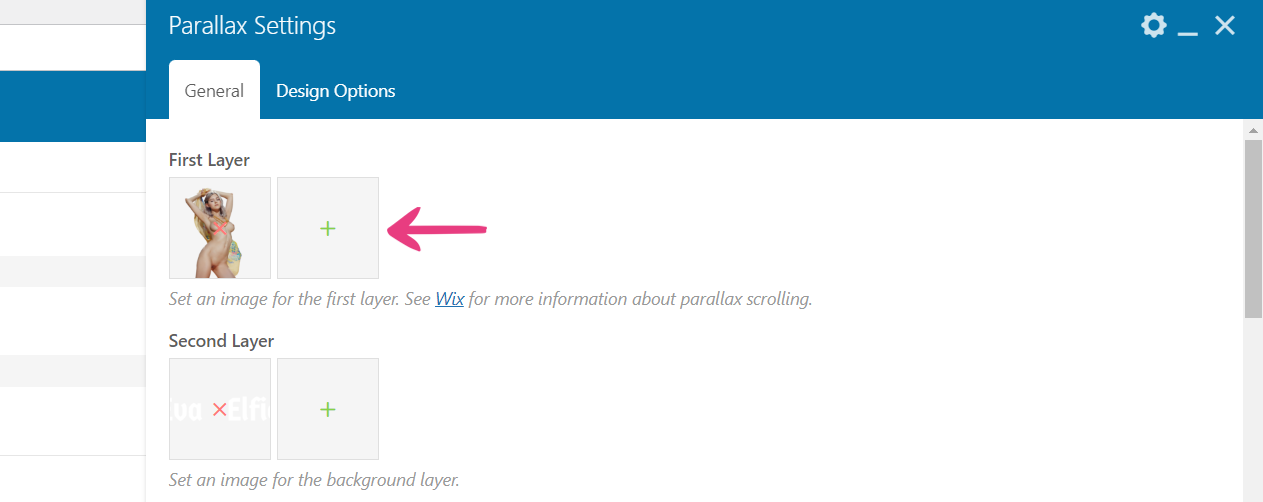
Whether you’ve decided to edit an existing widget or add a new one, both actions will result in the same window — Parallax Settings. The window will display three image options for the parallax’s layers and a text field that will be shown instead of the second layer on mobile devices.
First Layer
The First Layer option displays the image at the very top, that is, the front of the parallax, with all subsequent layers behind it.
Click on the plus icon to select an image from the media library or upload a new one from your device.

To upload an image, select the Upload files tab and click the Select Files button to pick the image that you want to upload. Alternatively, drag and drop the image over the white area.

Once the image is uploaded, or if you wish to select another image from the media library, select the Media Library tab and click on the desired image. The selected image will have a blue frame and a check mark (✓) in the top right corner.

Click the Set image button in the bottom right corner of the window to confirm your selection.

Note: The media library supports only the following image formats: .jpg, .jpeg, .png, .webp, and .gif. Other formats will not be displayed.
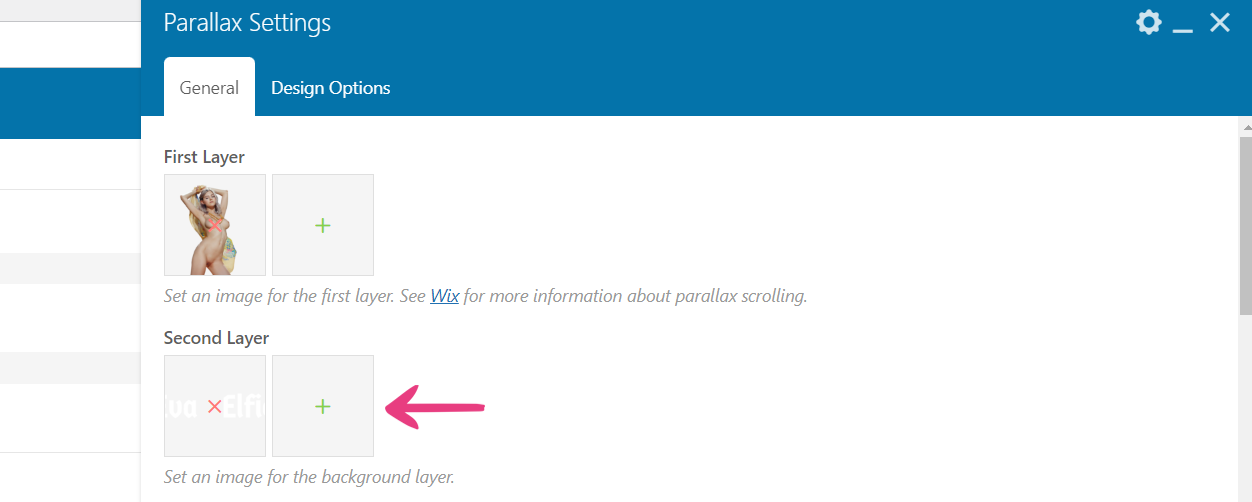
Second Layer
The Second Layer option displays the image right behind, that is, below the first layer.
Click on the plus icon and repeat the process described for the first layer to add a second image.

Background Layer
The third and final layer — Background Layer — displays the image below all other layers and serves as a background.
Click on the plus icon and repeat the process described for the first layer to add a background image.

Responsive Title
The Responsive Title option lets you enter the text that will be shown instead of the second (middle) layer on mobile devices.

If you don’t want to show any text in the second image’s place, you can simply skip this field.
When you’re done configuring your parallax, click the Save changes button at bottom.

Step 6
Click on the Update button on the right to apply all changes to the page.

Your new parallax will be immediately shown for all visitors on the page.

Visit our demo site for a live preview of the parallax feature.


